

Key Takeaways
A leaking transmission pan gasket is often a manageable repair when the leak is confirmed early and the vehicle is supported correctly.
- Confirm the fluid is coming from the pan gasket before removing anything.
- Use the gasket, filter, and fluid specified for the exact transmission.
- Support the vehicle on rated stands, never on a jack alone.
- Clean both sealing surfaces and tighten bolts to the specified torque.
- Check the fluid level and inspect for seepage after a short test drive.
Identify the source of the transmission fluid leak
Transmission fluid can escape from several places, so a wet pan does not automatically prove the gasket is at fault. Clean the area first, then watch where fresh fluid appears. A careful diagnosis prevents replacing a sound gasket while a seal, cooler line, or case joint continues to leak.
How to distinguish a pan leak from other transmission leaks
Park on a level surface and inspect the underside with a light. Fluid that gathers around the pan rail or drips from the pan’s lowest edge points toward the gasket or pan itself. Fluid beginning higher up may run downward and make the pan look guilty, so trace the wet path back to its highest fresh point.
A cooler line, axle seal, dipstick tube, or input seal can produce a different leak pattern. After cleaning, drive only far enough to create a small amount of fresh residue, then inspect again. A leak symptoms guide can also help compare fluid location and other early warning signs.
Signs of a damaged or deteriorated pan gasket
A gasket may harden, flatten, split, or lose its ability to compress evenly. Look for a continuous damp line along the pan flange, especially near bolt holes and corners. Repeated tightening can distort the flange and create gaps rather than fixing them.
Old sealant, torn gasket material, or a pan that has been removed before can make the repair less reliable. If fluid returns quickly after cleaning, treat that as evidence of an active seal failure rather than ordinary residue.
Checking the fluid color, odor, and leak location
Transmission fluid is commonly red, amber, or brown depending on its age and formulation, but color alone is not a diagnosis. Compare the fluid with a clean sample if possible, and notice whether it feels thin or unusually gritty. A strong burnt odor, dark fluid, or visible particles deserves more attention than a small clean seep.
Place clean cardboard under the suspected area overnight and compare the drip position with the transmission pan. Do not taste or handle unknown fluid unnecessarily; use gloves and wash exposed skin promptly. The location and condition of the fluid matter together.
When a leaking transmission requires professional diagnosis
A small pan seep may suit a careful home repair, but slipping, harsh engagement, grinding, warning lights, or a rapidly growing puddle changes the situation. Those symptoms can indicate low fluid or internal trouble beyond a gasket. A transmission that has been damaged by low fluid should not be treated as a simple sealing job.
Professional help is also sensible when access is blocked by exhaust or driveline components, the pan is badly bent, or the vehicle cannot be lifted securely. Stop driving if the fluid level is dangerously low or the transmission operation changes noticeably.
Gather the tools and replacement materials
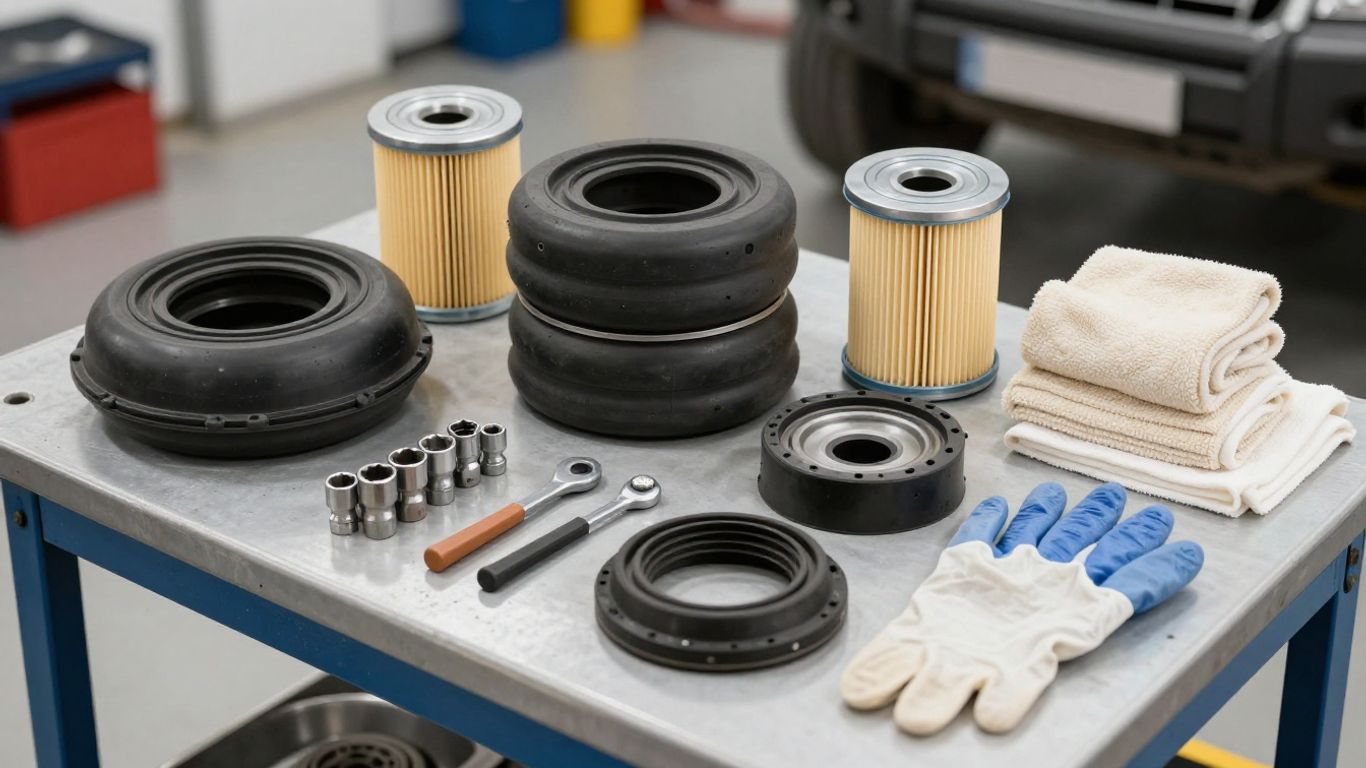
Good preparation makes transmission pan gasket repair cleaner and less rushed. Confirm the vehicle identification and transmission code before buying parts, because similar models can use different pans, filters, gaskets, and fluid specifications. Gather everything before lifting the vehicle so it does not remain supported while you search for a missing item.
Choosing the correct gasket for your transmission
Match the replacement gasket to the exact transmission and pan design, not merely the vehicle year. Compare its bolt-hole pattern, shape, material, and any molded locating features with the old part. Some applications use a gasket alone, while others call for a filter seal or a specified sealant at particular joints.
Read the service information before applying any adhesive. A gasket designed to seal dry can shift or swell if coated with excess sealant, and an incorrect product may make later removal difficult.
Selecting the right transmission fluid and filter
Use the fluid type and specification listed for the vehicle, transmission, or service documentation. Do not substitute based only on color or a general label such as “automatic transmission fluid.” The filter must also match the transmission, and its seal or O-ring should be replaced when the design requires one.
Check the fluid capacity, but treat it as a starting estimate because some fluid remains in the transmission and pan. The final level is set by the manufacturer’s checking procedure, not by pouring in the entire published capacity at once.
Essential hand tools, drain equipment, and cleaning supplies
A practical setup includes a socket set, extensions, a torque wrench, screwdrivers or suitable trim tools, a drain pan, shop towels, a scraper safe for the pan material, and an approved parts cleaner. A bright work light and a small inspection mirror can make the underside easier to read. Keep a measuring container nearby so the drained volume gives you a rough reference.
The following compact checklist helps prevent a mid-repair interruption:
- Correct gasket, filter, and filter seal or O-ring.
- Manufacturer-approved transmission fluid and a clean funnel or fill pump.
- Drain pan large enough for the expected fluid loss.
- Torque wrench, sockets, cleaning solvent, lint-free towels, and gloves.
Once these items are laid out, keep the replacement parts covered so dust does not settle on their sealing surfaces. Clean tools are especially useful when working around an open transmission.
Safety equipment and vehicle support requirements
Wear safety glasses, chemical-resistant gloves, and clothing that covers your arms. Transmission fluid can be hot, slippery, and irritating, while debris may fall as the pan is loosened. Use a floor jack only for lifting; support the vehicle with appropriately rated jack stands on solid, level ground.
Never rely on a spare tire jack or improvise with stacked materials. Chock the wheels that remain on the ground, keep the work area ventilated, and provide a safe route out from under the vehicle before beginning.
Prepare the vehicle for transmission pan gasket repair
The preparation stage controls most of the risk in this job. Give yourself enough room to work, identify every component that may obstruct the pan, and make a plan for containing fluid before the first bolt is loosened. Rushing here often leads to spills, damaged fasteners, or an unstable vehicle.
Parking, lifting, and supporting the vehicle safely
Park on a firm, level surface, select the manufacturer-recommended park or gear setting, and apply the parking brake. Chock the wheels, lift at the approved points, and place stands under the specified structural locations. Gently test the supported vehicle before getting underneath.
If the pan cannot be reached with adequate clearance, do not work around a suspension or exhaust component that is still carrying load. Consult the service procedure for any required removal and support steps.
Allowing the transmission to cool before service
Let the vehicle sit until the transmission and nearby exhaust components are safe to approach. Fluid trapped in the pan can remain hot even after the engine is switched off. A cool assembly also makes it easier to clean the flange without rushing or burning your hands.
Do not cool the transmission with water or spray directly onto hot components. Instead, plan the job after the vehicle has been parked long enough for temperatures to fall naturally.
Confirming the replacement parts and fluid specifications
Before draining anything, place the new gasket beside the pan and compare the outline and holes. Confirm the filter pickup, seal, fastener style, and fluid specification against reliable service information. This is the last easy moment to discover that a part was boxed for a similar but different transmission.
Record the vehicle’s current mileage and, if useful, take a photo of the underside. Those small references help when reconnecting brackets, shields, or wiring after the pan is installed.
Positioning a drain pan to manage fluid loss
Slide a broad drain pan beneath the transmission pan, allowing room for fluid to run from more than one edge. Place absorbent material around the work area without blocking your access or creating a tripping hazard. A shallow pan that fits under the vehicle is better than a deep container that catches the first drip but prevents the pan from being lowered.
Loosen the drain plug first if the transmission has one, following the service procedure. If it does not, expect fluid to spill as the pan separates and keep both hands available to control it.
Remove the transmission pan and old gasket
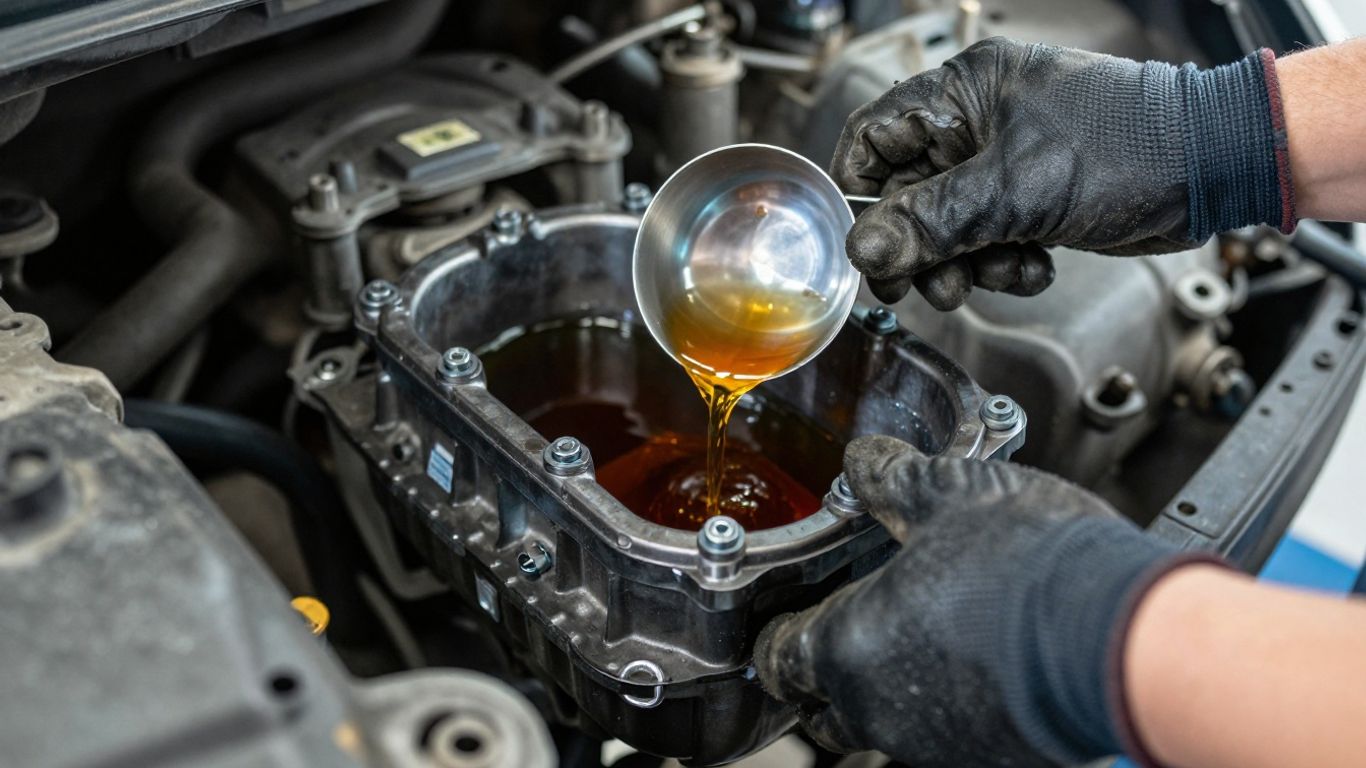
Removing the pan is the messiest part of the repair, and patience matters more than force. Keep track of bolt locations, brackets, and any small components that come away with the pan. Work slowly enough to avoid bending the flange or splashing fluid onto hot or sensitive parts.
Loosening the pan bolts in the correct sequence
Break the bolts loose gradually rather than removing one corner completely at the start. Support the pan as the final fasteners are loosened, and follow a crosswise or service-manual sequence when one is specified. Leave a few bolts loosely engaged until the pan is ready to lower.
If a bolt resists, use the correct socket and steady pressure. Rounded heads, damaged threads, or a spinning insert are reasons to pause and reassess rather than applying uncontrolled force.
Handling fluid trapped inside the pan
Even after the pan begins to separate, fluid may remain pooled inside it. Lower one edge slightly over the drain pan and let the fluid escape in a controlled stream. Keep your face and hands clear of the gap, since the pan can shift once its weight changes.
Once drained, lower the pan with both hands and set it on a stable, protected surface. Dispose of the fluid through an approved recycling or collection program, never into soil or a household drain.
Removing the old gasket without damaging the sealing surface
Peel away the gasket by hand where possible, then use a scraper appropriate for the pan and transmission materials. Avoid gouging aluminum or driving a sharp tool into the flange. Stubborn residue may need solvent and repeated light passes rather than one aggressive scrape.
Clean the flange only after the bulk of the old material is removed. A truly clean flange matters because even a small ridge can create a leak path when the new gasket is compressed.
Inspecting the pan for cracks, dents, and metal debris
Wash the pan and examine its rail, corners, drain-plug area, and bolt holes under good light. A dented rail may not sit flat, while a crack or damaged drain-plug thread requires repair or replacement before reassembly. Do not hammer a flange flat while it is unsupported; that can create new distortions.
Look for the normal fine residue collected by a magnet, if the pan has one, but treat large chips, sharp fragments, or unusual metal as a warning. Clean the magnet and record what you find before deciding whether the transmission needs further diagnosis.
Install the new gasket and transmission filter
With the pan removed, the sealing surfaces and filter are accessible, so this is the point to be methodical. Keep lint, dirt, and old sealant away from the open transmission. Work from clean hands and clean parts, and avoid touching the gasket’s sealing edges more than necessary.
Cleaning and preparing the mating surfaces
Wipe the transmission flange and pan rail with approved cleaner and lint-free towels. The surfaces should be dry, smooth, and free of oil film, old gasket fragments, and loose corrosion. Inspect again from several angles because residue often hides around bolt holes and corners.
Do not sand aggressively or remove metal from the flange. If the sealing face is deeply scored, warped, or damaged, replacing the gasket alone may not solve the leak.
Replacing the filter and filter seal when required
Remove the old filter according to the service procedure, noting its orientation and any retaining screws or clips. Compare the new filter with the old one before installation, then fit the new seal or O-ring if the design uses one. Lightly lubricate an O-ring only when the instructions permit it.
Seat the filter squarely and tighten its fasteners to the specified value. A filter that is loose, crooked, or missing its seal can create operating problems even when the pan gasket is perfect.
Positioning the new gasket without using excess sealant
Set the gasket on the pan or transmission flange as directed by the manufacturer. Align every hole and locating tab before bringing the surfaces together. If a small amount of sealant is specified, use only the product and locations called for; excess material can squeeze inside the transmission.
Start several bolts by hand to hold the gasket in place, then install the remaining bolts loosely. Check the perimeter once more before tightening so no section is folded or trapped.
Checking bolt condition and thread cleanliness
Inspect each bolt for stretched threads, corrosion, damaged heads, or an attached bracket that must return to a particular location. Clean reusable threads without removing their protective finish, and chase damaged threaded holes only with the correct tool and procedure.
Never compensate for a damaged thread by forcing a larger fastener or using a random washer. Replace questionable hardware or have the thread repaired before the pan is clamped down.
Reassemble and refill the transmission
Reassembly should be quiet and controlled. The gasket needs even compression, not brute force, and the fluid level needs a precise final check. Keep the drain pan beneath the work area until the pan and any related components are fully secured.
Tightening pan bolts to the manufacturer’s torque specification
Snug the bolts in a gradual crisscross pattern unless the service manual specifies another sequence. Then use a calibrated torque wrench to reach the manufacturer’s value in the stated stages. Do not tighten by feel, since over-tightening can bend the pan rail or squeeze out the gasket.
A useful reference is the difference between common tightening concerns:
| Condition | Likely concern | Correct response |
|---|---|---|
| Bolt turns freely | Damaged or stripped thread | Stop and inspect the hole |
| Pan rail bows near bolt | Excessive torque or prior damage | Correct the flange before final tightening |
| Gasket shifts | Poor alignment or excess sealant | Loosen, realign, and inspect |
| Wet edge after refill | Sealing or surface problem | Clean, locate, and diagnose the source |
The table is a reminder that a leak after tightening is not automatically fixed by adding more torque. Confirm the cause before disturbing a correctly installed gasket.
Reinstalling related components and lowering the vehicle
Return shields, brackets, linkage supports, wiring retainers, and other removed components to their original positions. Confirm that nothing touches the pan or exhaust and that every fastener is secure. Keep the vehicle supported until the underside inspection is complete.
Remove tools and absorbent materials from beneath the vehicle, then lower it using the approved lifting points. Do not start the engine while anyone is still underneath or while the vehicle is not safely positioned.
Adding the correct amount and type of transmission fluid
Add the specified fluid through the correct fill point using a clean funnel or pump. Begin with less than the estimated capacity, since some fluid remains in the transmission after a pan service. Pause periodically to avoid overfilling and wipe any spilled fluid from nearby surfaces.
The correct fluid is determined by specification, not by the color of what came out. If the wrong fluid was added, stop and follow the appropriate correction procedure rather than trying to dilute it with more fluid.
Setting the fluid level at the specified temperature
Follow the exact level-check procedure for the vehicle. It may require the engine running, the selector moved through each range, and the transmission brought to a specified temperature. A dipstick reading or overflow check taken under the wrong conditions can be misleading.
Use the correct temperature range and level surface, then add or remove small amounts as directed. Once the reading is correct, reinstall the dipstick or plug securely and clean the surrounding area.
A short visual demonstration can help with the general order of pan removal and refilling, but the vehicle’s service manual remains the authority for torque, fluid specification, and temperature.
Test the repair and prevent future leaks
The repair is not finished when the last bolt is tight. A controlled inspection confirms whether the gasket is sealing and whether any fluid was spilled during service. Take a few minutes to check the work before putting normal driving demands on the transmission.
Inspecting the pan and surrounding areas for seepage
Start the engine and let the transmission idle as directed, while watching the pan rail, drain plug, filter area, and nearby lines. Use a light, not your fingers, to check for fresh fluid. If you see seepage, switch off the vehicle and let moving or hot parts become safe before investigating.
Clean residue can make a small leak easier to spot. Marking the wet point with a temporary reference can also help distinguish a new leak from fluid left over from the service.
Verifying transmission operation during a road test
After the static inspection is dry, drive gently on a short route. Pay attention to delayed engagement, slipping, unusual noise, harsh shifts, or warning lights. Stop the test if operation changes or if a significant leak appears.
A road test should confirm normal behavior, not prove that the transmission can tolerate low fluid. Keep the route close to home or a repair facility until the follow-up inspection is complete.
Rechecking the fluid level after the repair
Return the vehicle to the specified level surface and repeat the manufacturer’s temperature and selector procedure. Check the pan and nearby components at the same time. The level may settle slightly after the filter fills, but do not add fluid without following the correct measurement process.
Record the final level, fluid type, and service date. That information makes future troubleshooting easier and gives the next technician a useful starting point.
Avoiding common causes of repeat gasket failure
Most repeat leaks come from a preventable combination of poor surface preparation, incorrect parts, uneven tightening, or a damaged pan. Keep the repair area clean and do not use extra sealant as a substitute for a flat flange and the correct gasket. For additional practical discussion of cleaning and bolt tightening, see these pan seal tips.
Let the vehicle cool before inspecting underneath, address any new seep promptly, and avoid pressure-washing fluid toward electrical connectors. A careful follow-up check is cheaper and safer than waiting for a small leak to become a transmission problem.
Conclusion
Transmission pan gasket repair is a straightforward job only when diagnosis, vehicle support, part selection, cleaning, torque, and fluid-level checks are handled in that order. Take your time with the messy parts, follow the vehicle-specific service procedure, and verify the result before returning to normal driving.
Frequently Asked Questions
How long does transmission pan gasket repair take?
The repair may take a few hours for an accessible pan, though rusted fasteners, obstructed components, cleaning, and the required fluid-level procedure can extend the work.
Can I replace a transmission pan gasket without changing the filter?
Some service procedures allow that, but many pan services include filter replacement. Follow the transmission-specific instructions and replace the filter seal when required.
Should I use gasket sealant on a transmission pan?
Use sealant only if the manufacturer specifies it, and apply it only in the stated locations. Excess sealant can interfere with the transmission or prevent the gasket from seating correctly.
How do I know whether the pan itself is damaged?
Inspect the rail for dents, cracks, distorted bolt holes, and deep scratches after cleaning. A pan that does not sit flat may need repair or replacement rather than another gasket.
What happens if the transmission fluid is overfilled?
Overfilling can cause foaming, abnormal operation, and leaks. Check the level under the specified temperature and operating conditions, then correct it according to the service procedure.
Can I drive with a transmission pan gasket leak?
A very small seep may allow a short trip to a repair location, but a growing puddle, low fluid, slipping, harsh shifting, or warning light means driving should stop until the cause is assessed.
Why is the transmission still leaking after a new gasket?
The pan may be bent, the bolts may be unevenly tightened, the surfaces may be contaminated, or the leak may originate above the pan. Clean the area and trace the fresh fluid to its highest point before repeating the repair.