

Key Takeaways
A careful diagnosis is the foundation of a successful Mitsubishi Triton gearbox rebuild. The right parts, measurements, assembly procedures, and post-repair testing matter just as much as the initial fault finding.
- Confirm the vehicle and transmission details before ordering parts.
- Separate gearbox faults from clutch, linkage, lubricant, and drivetrain problems.
- Inspect and measure every reusable internal component before reassembly.
- Compare rebuild, reconditioned, and replacement options using total installed cost.
- Ask about parts quality, warranty coverage, and post-rebuild support.
When a Mitsubishi Triton gearbox rebuild is necessary
A gearbox rebuild is usually considered when internal wear is causing persistent noise, difficult gear selection, or repeated disengagement. It can preserve a serviceable housing and other reusable components instead of replacing the entire assembly. The decision should follow testing rather than be based on mileage or a single symptom.
Common symptoms of internal gearbox damage
Grinding during a particular gear change often points toward synchronizer wear, while a humming or whining sound that changes with road speed may involve bearings or gear teeth. Difficulty selecting gears, jumping out of gear, and metal particles in drained lubricant are further reasons to investigate the gearbox internally. None of these signs proves a rebuild is required on its own, because clutch and linkage faults can feel very similar.
A useful first step is to record when the problem occurs: cold or hot, under acceleration or overrun, in one gear or several. That pattern gives the technician a better starting point and helps avoid replacing sound components.
Rebuild versus replacement versus reconditioned gearbox
A rebuild uses the vehicle’s gearbox as the starting point, replacing worn components and reusing parts that pass inspection. A replacement may mean a used or exchange unit, while a reconditioned gearbox has already been dismantled, inspected, and rebuilt by a specialist. The best choice depends on the condition of the original housing, parts availability, turnaround time, and the warranty offered.
For example, drivers comparing exchange options can review reconditioned Triton gearboxes alongside the cost of dismantling their own unit. The comparison should include removal, freight, fitting, fluids, and any refundable core charge, not just the advertised unit price.
How driving conditions affect gearbox wear
Frequent towing, heavy payloads, steep terrain, and slow off-road work place extra heat and load through the clutch and transmission. Poor shifting technique, riding the clutch, or forcing a gear before the shaft speeds have synchronized can accelerate wear as well. Water or dust exposure can also create problems if seals, breathers, or cleaning practices are neglected.
That does not mean hard use automatically calls for a rebuild. It means the inspection should consider how the vehicle is used, which gears carry the most load, and whether the lubricant service history is known.
Why accurate diagnosis matters before disassembly
Disassembly takes time and can expose the owner to unnecessary parts and machining costs. A clutch that fails to release, a worn shifter bush, a damaged mount, or an incorrect lubricant can mimic an internal gearbox fault. A competent diagnosis narrows the repair and provides a baseline for deciding whether the casing and shafts are worth saving.
The goal is not simply to find something worn. It is to connect the observed symptom with a failed component and confirm that the proposed repair addresses the original complaint.
Diagnosing Mitsubishi Triton gearbox problems
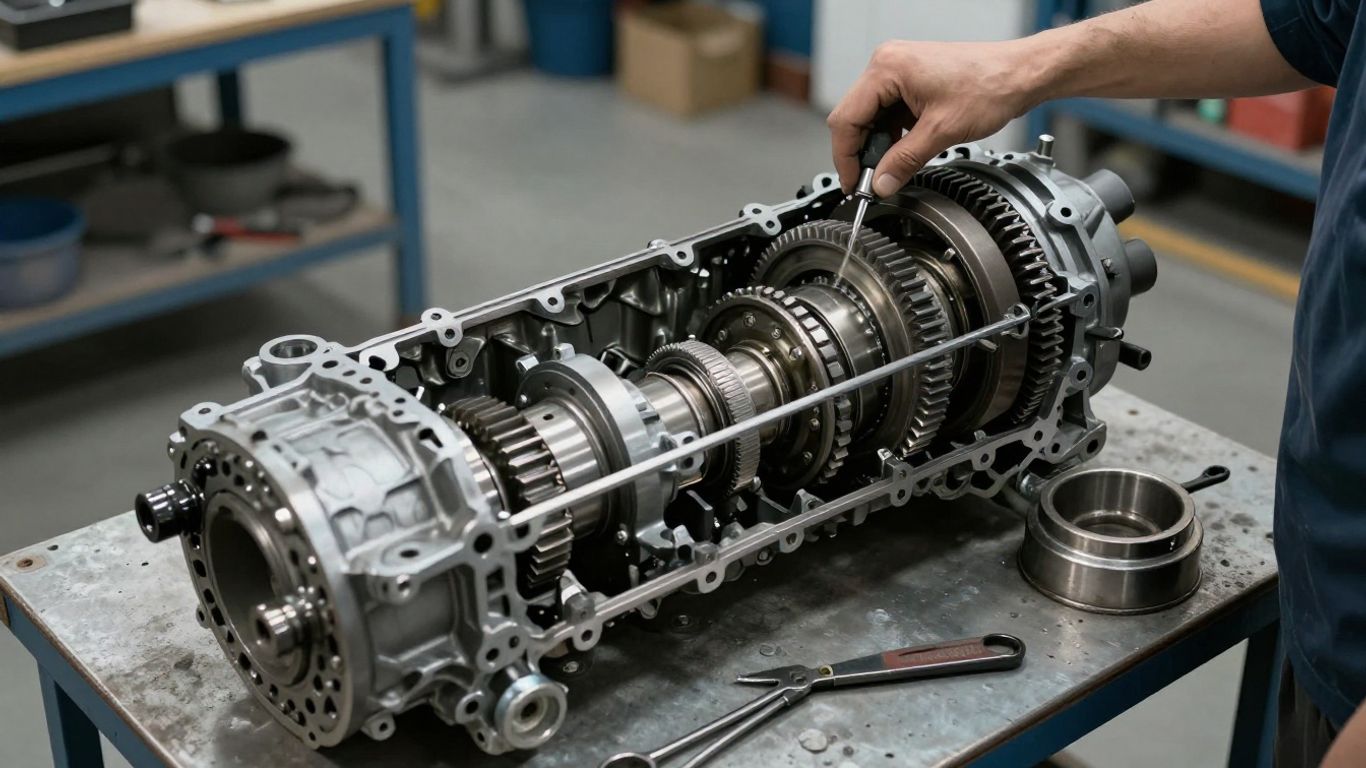
Diagnosis should move from simple external checks to controlled testing before the gearbox is removed. Fluid, leaks, linkage, clutch operation, and noise patterns can reveal a great deal without opening the casing. A written inspection record also makes later cost estimates easier to understand.
Checking fluid condition, level, and leaks
The lubricant level should be checked using the correct procedure for the transmission, with the vehicle safely supported and level. Inspect the drain plug and lubricant for unusual metallic debris, then look around seals, the casing joint, breather, and nearby components for wetness. A leak may be the primary failure or a sign that a bearing or shaft has developed excessive movement.
Fluid appearance is evidence, not a final diagnosis. A small amount of fine paste on a magnetic plug may differ from larger chips or visible brass-colored material, so findings should be photographed and discussed with the technician.
Identifying gear-specific noises and vibrations
Noise that appears only in one gear can point toward that gear pair or its bearing load, whereas noise in neutral with the clutch engaged may involve the input side. A vibration tied to engine speed is different from one tied to vehicle speed, and the distinction helps separate gearbox concerns from driveline or engine issues. Sound recordings can help, but they rarely replace an in-person road test.
Pay attention to whether the noise changes when the throttle is applied, released, or the clutch pedal is depressed. Those changes are often more useful than simply describing a sound as loud or rough.
Testing clutch, shifter, and transmission linkage components
The clutch must release fully for manual gears to engage cleanly. Check pedal travel, hydraulic operation where fitted, clutch adjustment, shifter movement, bushes, cables, and linkage pivots before condemning internal synchronizers. Excessive free play or a restricted movement at the selector can make a healthy gearbox feel defective.
A workshop should also check mounts and related driveline parts, since movement under load can create clunks or alter the alignment of the shift mechanism. This external work is relatively small compared with gearbox removal.
Using a road test to reproduce the fault
A road test should be planned around the complaint and performed in a safe location. The technician can check cold and warm operation, each gear under light and moderate load, acceleration, deceleration, and clutch engagement. Reproducing the fault makes the eventual inspection more targeted.
Use a clear worksheet for the test: note the selected gear, engine load, road speed, temperature, pedal position, and exact noise or shift behavior. That record prevents an intermittent issue from becoming a vague workshop description.
Preparing for the gearbox rebuild
Preparation reduces delays and prevents the common mistake of ordering a generic kit for a transmission that has different internal specifications. Vehicle identification, parts verification, workspace planning, and documentation all belong in this stage. It is also the point to agree on how additional damage will be handled if the first inspection changes the estimate.
Confirming the Triton model, engine, and transmission code
A Triton model year alone may not identify every relevant gearbox variation. Record the engine, drivetrain configuration, build information, transmission code, and any identification marks on the casing. The technician should confirm these details against parts catalog information before ordering bearings, synchros, seals, or gears.
A workshop reference can help with identification and procedures; the workshop repair manual is described as covering 1996–2015 Mitsubishi L200, or Triton, pickup repair and service information. It should still be matched to the exact vehicle and transmission rather than treated as a universal substitute for verification.
Choosing the correct rebuild kit and replacement parts
A rebuild kit commonly includes bearings, seals, and gaskets, but the exact contents vary. Synchronizers, circlips, shims, selector components, and individual gears may need to be purchased separately after inspection. Ask whether the kit is complete for the identified transmission and whether replacement parts meet the intended use.
The price of a kit is only one part of the decision. A cheaper package that omits a needed seal or bearing can create another delay once the gearbox is already apart.
Inspecting compatible bearings, seals, synchros, and gears
Parts should be checked for correct dimensions, tooth profile, spline configuration, and compatibility with the transmission code. Bearings need smooth rotation and the right clearance; seals need the correct diameter and material; synchronizer rings should be assessed against their mating cones. Gears require close inspection for pitting, chipped teeth, abnormal polishing, and wear on engagement surfaces.
Some suppliers also offer broader gearbox rebuild kits and reconditioned exchange manual gearboxes for 4×4 vehicles. The useful comparison is whether the listed components match the specific Triton transmission, not simply whether the application appears similar.
Setting up tools, workspace, and safety equipment
Gearbox work requires a stable bench, suitable lifting equipment, cleaning facilities, measuring tools, pullers, circlip pliers, and a reliable torque wrench. Keep removed parts organized by shaft and position, and photograph selector arrangements before dismantling. Eye protection, gloves suited to the chemicals in use, and secure vehicle support are basic requirements.
Cleanliness is part of preparation too. A dirty bench or mixed container can turn a straightforward assembly into a search for a missing shim or contaminated bearing.
The Mitsubishi Triton gearbox rebuild process
The process begins with safe removal and ends only after measured components have been rebuilt and tested. There is no sensible shortcut around inspection: opening the casing reveals the actual condition of gears, shafts, bearings, and selectors. The sequence below describes the general workflow, while exact procedures remain transmission-specific.
Removing the gearbox from the vehicle
The vehicle is secured, the battery and relevant electrical connections are isolated as required, and the surrounding driveline components are marked or documented. Depending on the configuration, removal may involve the propeller shaft, transfer case connections, crossmember, exhaust clearance, starter, clutch components, and wiring. The gearbox must be supported before mounts and fasteners are released.
Removal is a heavy mechanical operation, not just an unbolting exercise. Correct lifting points and a stable transmission jack protect both the technician and the casing.
Disassembling and cleaning internal components
Once on the bench, the gearbox is drained, its exterior cleaned, and the casing opened according to the service procedure. Shafts, selectors, hubs, rings, bearings, and shims should be laid out in order and tagged. Components are then cleaned so that cracks, scoring, pitting, and discoloration are visible.
Cleaning before inspection matters because old lubricant can hide damage around teeth and bearing seats. It also prevents grit from moving into a replacement bearing during assembly.
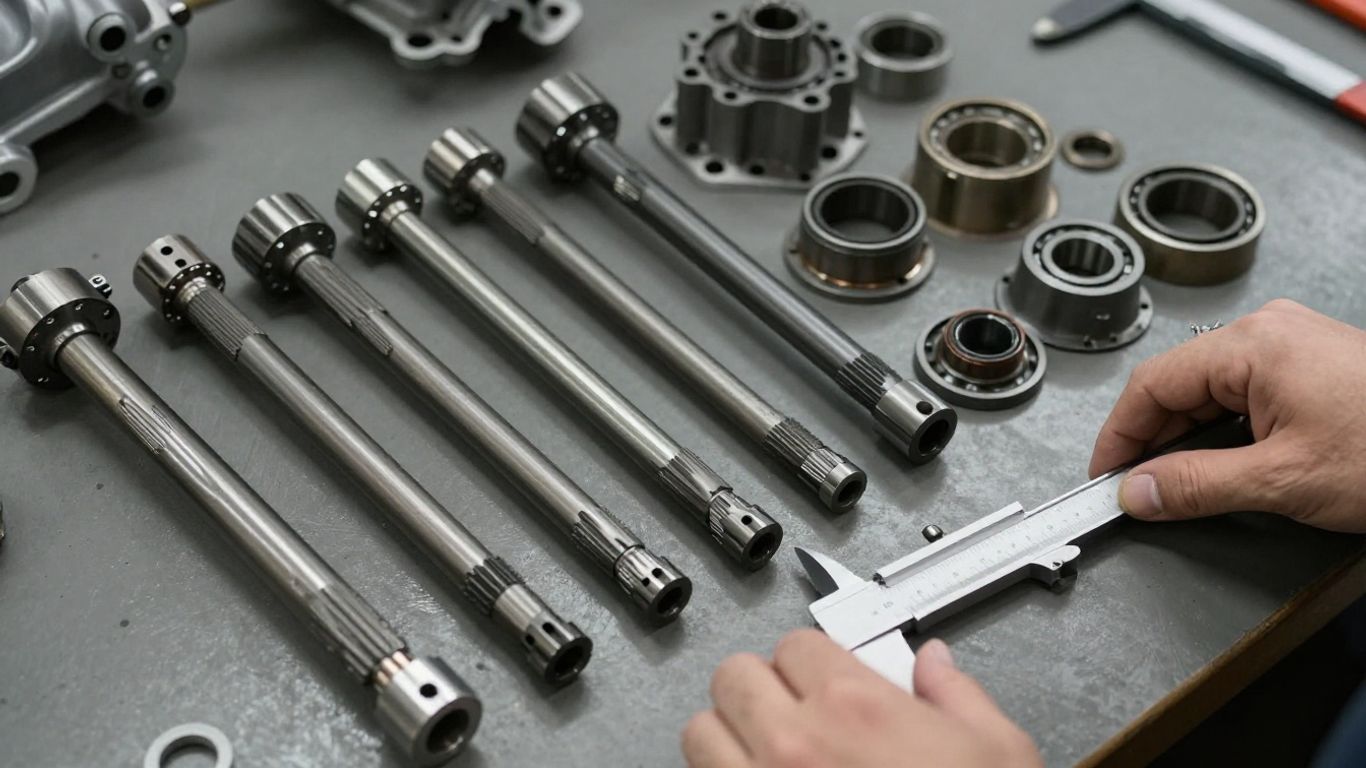
Measuring shafts, gears, and bearing surfaces
Visual inspection is followed by measurement with tools appropriate to the specification, such as micrometers, gauges, and a straightedge. Check shaft journals, bearing fits, gear widths, synchronizer clearances, selector components, and casing bores. Compare results with the manufacturer limits rather than relying on whether a part merely feels tight.
The measurements determine what can be reused and what needs replacement or machining. They also help identify the source of excessive end float, recurring noise, or difficult engagement.
Replacing worn synchronizers, bearings, seals, and gaskets
Worn synchronizers can cause baulking or grinding, while rough bearings may create a whine that changes with load. Seals and gaskets are normally renewed during a rebuild because access is easy while the unit is apart, but replacement should still use compatible parts and correct installation methods. Damaged circlips, springs, thrust washers, and selector pieces should not be overlooked.
The parts list should be updated after inspection, with each addition tied to a measured or visible defect. That makes the repair easier to approve and reduces surprises at collection.
Reassembling the gearbox to manufacturer specifications
Reassembly follows the documented order, with shafts, hubs, selectors, shims, bearings, and retainers installed in their correct positions. End float, preload, gear engagement, and selector movement are checked as the assembly progresses rather than left until the casing is sealed. Sealant must be applied only where specified and in the correct amount.
This is where careful dimensional setup separates a lasting rebuild from a parts swap. A gearbox can contain new bearings and still fail early if preload, clearance, or torque is wrong.
Parts and technical details that affect rebuild quality
Good components cannot compensate for incorrect clearances or contamination. Rebuild quality depends on matching parts to the transmission, measuring the assembly, and following the documented sequence. It is also worth distinguishing a part that is worn from one that has been damaged by a larger underlying problem.
Selecting original-equipment and aftermarket components
Original-equipment parts may be preferred where fit, material, or availability is critical, while reputable aftermarket components can be appropriate when their specifications and quality are known. The decision should consider the vehicle’s load, towing, terrain, expected service life, and the supplier’s traceability. Avoid mixing unknown parts simply to reduce the initial estimate.
A specialist should explain which parts are being replaced, which are being reused, and why. That explanation is more useful than a generic promise of a complete rebuild.
Understanding bearing preload and gear backlash
Bearing preload controls how the bearing supports the rotating shaft, while gear backlash provides the required clearance between mating teeth. Both are set through the correct combination of components, shims, measurements, and torque. Too little or too much clearance can produce noise, heat, rapid wear, or difficult operation.
These values are not safely estimated by feel. The technician should record the measurements and adjustments so the final setup can be checked against the relevant workshop procedure.
Replacing damaged housings, shafts, and gears
A cracked housing, worn bearing seat, bent shaft, or chipped gear may make a basic kit insufficient. Machining may restore a surface in some cases, but other damage requires replacement of the component. The cost decision should account for the risk of reusing a part that could damage new bearings or gears.
When damage extends beyond consumables, request a revised estimate before assembly continues. That is usually less disruptive than discovering the issue after the gearbox has been installed.
Preventing contamination during assembly
All parts should be clean, dry, and protected from dust between inspection and assembly. Use lint-free materials, clean lubricant, covered containers, and a bench separated from grinding or machining work. Keep seal lips and bearing surfaces free from abrasive particles.
A clean assembly also makes later diagnosis easier because fresh debris is more readily identified. Small habits here protect the money already spent on precision components.
Following torque settings and workshop manual procedures
Fasteners, retainers, covers, and plugs must be tightened using the specified sequence and torque. Where a procedure calls for a particular sealant, lubricant, circlip orientation, or measurement method, follow it rather than substituting a familiar shortcut. The manual and transmission-specific data should remain available throughout the build.
Generic torque values are not a safe substitute for the correct specification. A documented checklist can help the technician confirm that each critical step was completed before the casing is closed.
Reinstalling and testing the rebuilt gearbox
Installation is part of the repair, not an afterthought. A correctly rebuilt gearbox can still shift poorly if the clutch is misaligned, the linkage is adjusted incorrectly, or the wrong lubricant is used. Initial testing should therefore be gradual and documented.
Checking clutch alignment and related components
Before the gearbox is raised into position, inspect the clutch disc, pressure plate, release mechanism, pilot support where fitted, and mounting surfaces. Use the correct alignment tool and confirm that the input shaft can enter without force. Any clutch fault found at this stage is cheaper to address than after reinstallation.
Check that the gearbox and engine faces meet evenly and that mounts are not carrying abnormal tension. Forced alignment can damage components that were just rebuilt.
Refilling the gearbox with the correct lubricant
Use the lubricant grade and quantity specified for the exact transmission. Some manual gearboxes require fluid with particular synchronizer compatibility, so engine oil or a generic gear oil should not be substituted casually. Fill on a level vehicle to the prescribed level and inspect the plug and sealing washer.
Fresh fluid does not hide an assembly problem. It simply provides the correct operating environment for the repaired components.
Adjusting the shifter and linkage
Reconnect the shifter, cables, rods, and brackets carefully, then set the mechanism according to the applicable procedure. With the engine off, move through all gears and check for a positive, unobstructed selection. Excessive play, stiffness, or a gear that cannot be selected should be corrected before driving.
Also confirm that the linkage is not contacting the body, exhaust, or transmission tunnel. Small alignment issues can become more obvious once the vehicle moves.
Performing initial road tests and break-in checks
The first drive should use light loads and a route where the technician can safely stop and inspect the vehicle. Check every gear, clutch take-up, reverse selection, coast-down behavior, and operation at different temperatures. Avoid heavy towing, hard launches, and prolonged high-load driving until the shop’s break-in guidance has been followed.
A gradual check helps reveal an installation issue before it becomes internal damage. The driver should return with a precise description of any unusual sound or shift quality rather than continuing to test aggressively.
Monitoring for leaks, noise, and shifting problems
After the road test, inspect the casing, seals, plugs, mounts, and surrounding areas for leaks. Listen for changes in bearing or gear noise and check whether any gear resists selection or disengages. Recheck fluid level when the specified inspection conditions are met.
Keep the invoice, parts information, test notes, and warranty terms together. That record supports a faster response if a concern appears during the early service period.
Mitsubishi Triton gearbox rebuild costs and service decisions
The price of a Mitsubishi Triton gearbox rebuild cannot be determined reliably from a kit price alone. Labor, removal, cleaning, measurements, machining, replacement components, fluids, and testing all contribute. A clear estimate should separate known work from allowances for damage discovered after disassembly.
Labor, parts, machining, and diagnostic expenses
Labor may cover diagnosis, removal, teardown, cleaning, inspection, assembly, refitting, and road testing. Parts costs depend on the number of bearings, synchros, seals, gears, shafts, or housings that fail inspection. Machining can add cost when bearing seats or other precision surfaces need attention.
Diagnostic work deserves its own place in the estimate because it prevents unnecessary disassembly. The cheapest initial inspection is not always the lowest total repair cost if it misses the original fault.
Factors that increase the total rebuild price
The final bill commonly rises when several internal components are damaged, parts are scarce, machining is required, or the gearbox is difficult to remove. Towing use and neglected leaks may also increase the scope if related components have been affected. Freight, exchange deposits, taxes, and clutch work should be clarified before approval.
Ask the shop to identify assumptions in writing. A quote that explains what happens if a shaft or housing fails inspection is easier to compare than a single unexplained figure.
Comparing a local specialist with a replacement unit
A local rebuild allows direct discussion of the failed parts and may retain a known, matching casing. An exchange or replacement unit can shorten vehicle downtime, but its price may exclude fitting, freight, core charges, or related repairs. A unit marketed for a similar Triton still needs confirmation against the model, engine, drivetrain, and transmission code.
For some older ML applications, a specialist listing such as an ML 4WD gearbox may provide a useful reference point for what a reconditioned unit includes. Treat advertised specifications as a starting point and verify the exact application before purchase.
Questions to ask a gearbox rebuilding shop
A short conversation can expose gaps in an estimate before the vehicle is booked. Ask these practical questions:
- Which fault has been confirmed, and what testing supports it?
- Which components are included in the quoted rebuild?
- Will the gearbox be measured against manufacturer limits?
- What machining or extra damage would trigger a revised estimate?
- What warranty applies to parts, workmanship, and follow-up repairs?
The answers should be specific to the vehicle and transmission, not just a general description of the shop’s process. Ask for photos or a parts report if the gearbox is being rebuilt remotely.
Understanding warranties and post-rebuild support
Read the warranty for duration, distance limits, exclusions, lubricant requirements, and who pays removal or freight if a problem occurs. Confirm whether towing, commercial use, modifications, or competition use changes the coverage. A warranty is more useful when the shop also provides a clear process for reporting symptoms and arranging inspection.
Keep service records and follow the recommended early checks. Good post-rebuild support includes practical guidance on break-in, leak monitoring, and what to do if shifting or noise changes.
Conclusion
A successful Mitsubishi Triton gearbox rebuild starts with a measured diagnosis and ends with careful installation and testing. Confirm the transmission identity, inspect every internal component, use compatible parts, and compare the complete installed cost before choosing between a rebuild and another unit. Taking those steps gives the repair a much better chance of restoring quiet, predictable gear selection.
Frequently Asked Questions
How long does a gearbox rebuild take?
Timing depends on vehicle access, gearbox removal difficulty, parts availability, machining, and the amount of damage found after disassembly. A straightforward rebuild may move quickly, while scarce parts or additional machining can extend the job.
Can a noisy gearbox be repaired without a full rebuild?
Sometimes the cause is external, such as low lubricant, a linkage issue, a mount, or a clutch fault. If testing confirms internal bearing or gear damage, opening the gearbox is usually necessary to determine the complete repair scope.
What does metal in gearbox oil mean?
Metal debris indicates wear or damage somewhere in the transmission, but its size, color, and quantity matter. The debris should be inspected with the noise and symptoms rather than used alone to decide which parts need replacement.
Should the clutch be replaced during a gearbox rebuild?
The clutch should be inspected while access is available. Replacement may be sensible if the disc, pressure plate, release bearing, or related components show wear, but the decision should follow their condition and the vehicle owner’s plans.
Is a reconditioned gearbox better than a used gearbox?
A reconditioned unit generally comes with an inspection and replacement process, while a used unit may have an uncertain history. Compare the warranty, documented work, compatibility, testing, and total installed price rather than assuming either option is automatically better.
What lubricant should be used after a rebuild?
Use the grade and specification listed for the exact transmission. Synchronizer materials can be sensitive to lubricant choice, so a generic fluid should not be selected without checking the applicable service information.
How can a rebuilt gearbox be protected after installation?
Use the correct lubricant, avoid excessive clutch slip and forced shifts, follow the recommended break-in approach, and inspect promptly for leaks or abnormal noise. Addressing a small concern early can prevent damage to newly installed components.