

Key Takeaways
A gearbox seal replacement is usually straightforward when the leak is correctly identified and the gearbox is supported securely. Take your time with cleanliness, seal orientation, and fluid selection.
- Confirm the leak source before ordering parts.
- Use a seal made for the exact gearbox model.
- Support the vehicle and drain the oil safely.
- Inspect the shaft and housing before fitting the new seal.
- Recheck the repair after a short road test.
Identify the leaking gearbox seal and its cause
Oil around a gearbox does not always mean the nearest seal has failed. Fluid can travel along a housing or shaft, making a small leak look much larger than it is. Begin with a clean surface and a careful inspection, because the right diagnosis prevents unnecessary disassembly.
Common signs of a failed gearbox seal
A dark, oily film around a shaft, flange, or gearbox joint is the most obvious warning. You may also see drops beneath the vehicle, a low fluid level, or oil thrown outward by a rotating component. A burning smell can occur when leaked oil reaches a hot exhaust or another heated surface.
A slow seep deserves attention even if the gearbox still operates normally. Small leaks become expensive problems when the fluid level falls far enough to starve gears or bearings.
How to locate the source of the leak
Clean the gearbox exterior with a suitable degreaser, allow it to dry, and place clean cardboard beneath the assembly. After a short drive or a brief period of operation, inspect the highest fresh trace rather than the lowest drip. A flashlight and small inspection mirror can help around crowded housings.
Check the breather or vent as well. A blocked vent, overfilled case, water contamination, or abnormal operating pressure can push sound seals beyond their normal limits. A gearbox seal replacement guide can provide another general reference for these common leak causes.
Differences between input, output, and axle seals
The input seal sits where power enters the gearbox, often near the clutch or drive coupling. Output seals are found where power leaves toward a driveshaft, transfer case, or other driven assembly. Axle seals sit at the differential or axle interface and may leak onto nearby suspension or brake components.
Location affects access, but the diagnostic principle is the same: follow the fresh oil to its highest point and compare the seal location with the fluid pattern. Do not assume a wet housing seam is itself the source.
When a leak points to a larger gearbox problem
A replacement seal may not last if the shaft is bent, a bearing has excessive play, or the housing is cracked. Persistent noise, difficult shifting, metal in the drained oil, or a seal that fails again quickly calls for a broader inspection.
Also investigate a damaged vent, incorrect fluid level, or misaligned connected component. If the gearbox must be removed for deeper inspection, a qualified technician may be safer than forcing the repair in place.
Gather the right tools, parts, and safety equipment
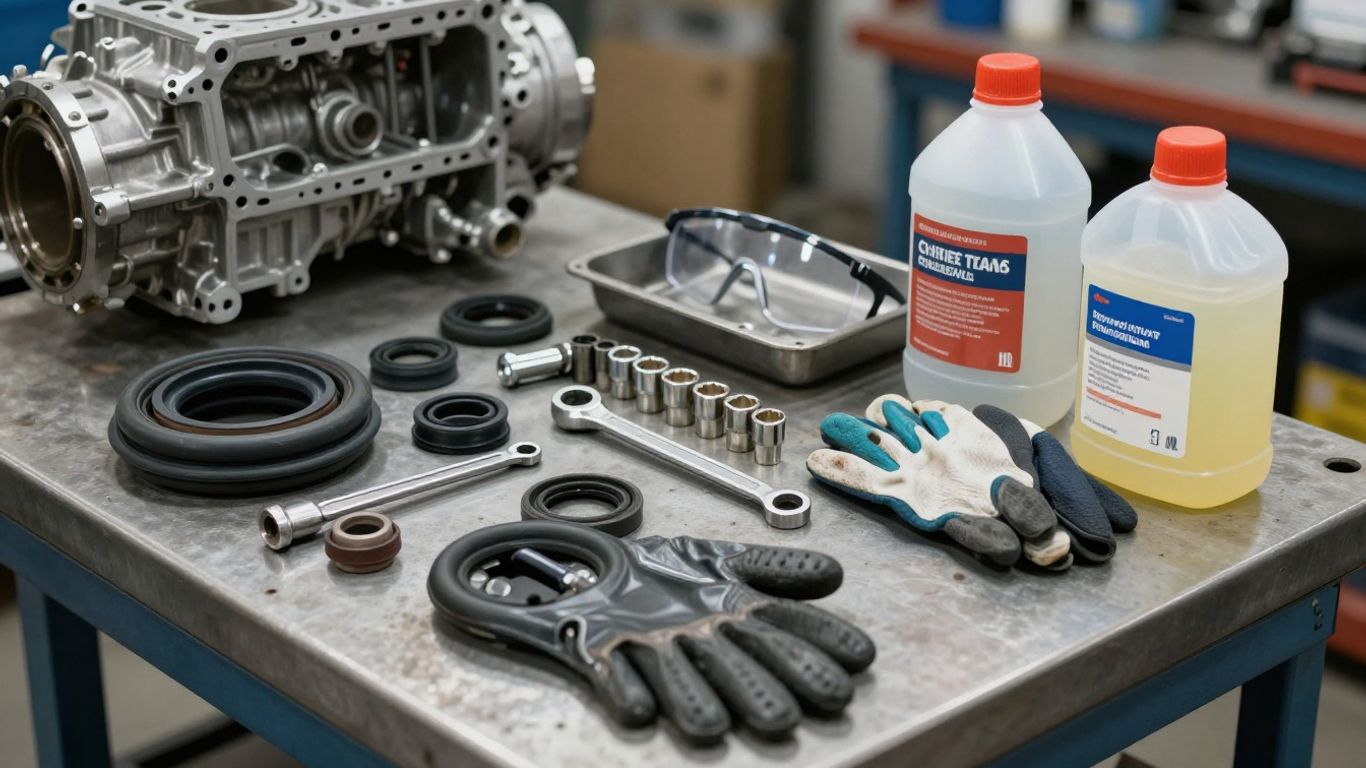
Good preparation keeps the job controlled and reduces the chance of damaging a new seal. Identify the gearbox model, seal position, and fluid specification before buying parts. The same-looking seal can differ in diameter, material, thickness, or installation depth.
Choosing the correct replacement seal
Use the vehicle or equipment identification number and the gearbox manufacturer’s parts information to select the seal. Compare the old part only after removal; an incorrect seal may have been installed previously. Confirm the shaft diameter, outside diameter, width, lip design, and material where those details are available.
A gearbox seal selection should match the application and protect against the contaminants present around that shaft. Keep the new seal packaged until the housing is ready.
Essential hand tools and specialty equipment
Most repairs need sockets, wrenches, screwdrivers, pliers, a torque wrench, drain pans, cleaning brushes, and a light. Depending on access, add a seal puller, slide hammer, bearing separator, or purpose-made seal driver. A soft-faced hammer and appropriately sized sockets can help with installation, but never use a tool that contacts the flexible sealing lip.
Recommended fluids, cleaners, and installation materials
Have the specified gearbox oil, replacement washers or O-rings, a non-abrasive cleaner, lint-free cloths, and a small amount of compatible assembly lubricant ready. Thread-locking compound should be used only where the service instructions call for it. Avoid improvising with grease or sealant in places where the design requires oil and a dry seating surface.
Keep a measured container nearby so the drained fluid can be assessed and disposed of properly. Milky oil, a strong burnt odor, or visible metal particles should change the plan from a simple seal job to further diagnosis.
Safety precautions before starting the repair
Work on a cool vehicle or machine, on firm level ground, with the parking brake applied. Wear eye protection and gloves, and use rated stands or equipment supports rather than relying on a jack. Keep loose clothing and hands away from rotating parts during any later inspection.
Unrelated research should not distract from the repair: pages such as an HVAC local SEO guide, Home Team Luxury Rentals, or OLLY PBC concern different subjects and are not substitutes for gearbox service information. For this job, the vehicle manual and gearbox documentation should control.
Prepare the vehicle and gearbox for seal removal
Preparation is where many avoidable mistakes are prevented. Photograph the assembly before removing anything, identify the drain and fill points, and make sure replacement parts are on hand. Leave enough time to clean each mating surface rather than rushing to beat a deadline.
Supporting the vehicle and accessing the gearbox
Raise the vehicle only at approved lifting points and support it with stands rated for its weight. Remove guards, covers, or skid plates as needed, but keep hardware grouped by location. Make sure there is room to move the connected shaft or flange without placing a side load on the gearbox.
If the gearbox is part of a machine rather than a road vehicle, isolate the power source and prevent unexpected movement. Access should be stable before a tool is placed against the old seal.
Draining and handling the gearbox oil
Clean around the fill and drain plugs before loosening them. Open the fill plug first when practical, since discovering a seized fill plug after draining leaves the gearbox stranded. Position a broad drain pan, remove the drain plug carefully, and allow the oil to finish flowing.
Record the oil’s color, smell, and debris. Replace crushed sealing washers where specified, and transfer the used oil to a suitable container for recycling or approved disposal.
Removing connected components without damage
Depending on seal location, you may need to remove a propeller shaft, axle, pulley, flange, coupling, or protective cover. Support heavy components instead of letting them hang from a joint. Pry only against designated solid areas, and protect machined surfaces from screwdriver tips.
If a flange or coupling is tight, use the correct puller rather than striking the shaft. Excessive force can shift bearings, distort a flange, or create a second leak.
Marking parts for accurate reassembly
Use a paint marker or punch marks to record the relationship between flanges, shafts, and balance components. Photograph cable routes and bracket positions, and place fasteners in labeled bags. These simple records are especially useful when several similar bolts are removed.
Do not mark a sealing surface with a deep punch. A light reference mark on a non-mating area is enough to restore alignment without creating a future leak path.
Remove the old gearbox seal
Once the connected parts are clear, protect the gearbox from dirt and accidental tool slips. The old seal can be stubborn, particularly when heat, corrosion, or age has hardened its outer edge. Work patiently and keep the extraction force directed toward the seal, not the bearing or housing.
Cleaning the seal housing and surrounding area
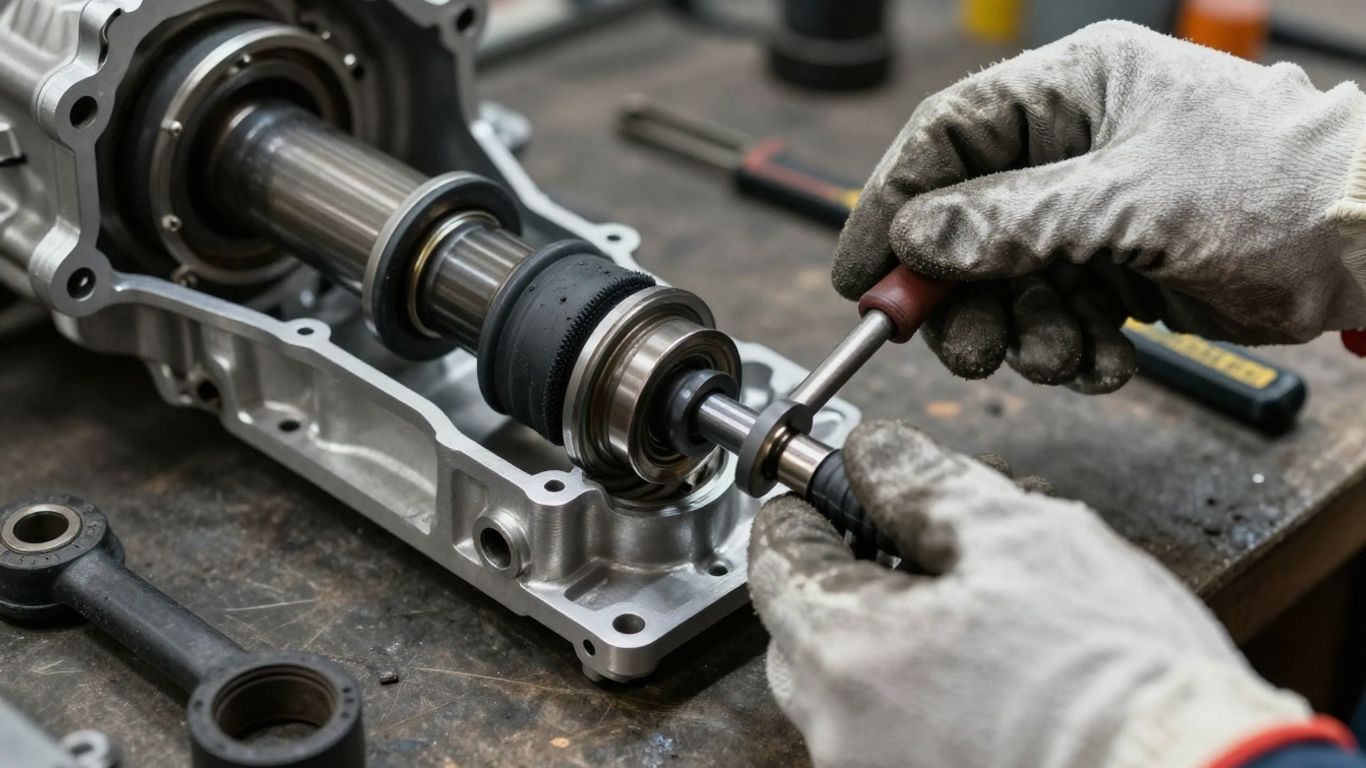
Brush loose dirt away before using cleaner, then wipe the housing and shaft with lint-free cloths. Cleaning first prevents grit from being dragged into the bore when the seal is removed. Cover open gearbox areas if the repair pauses.
A clean surface also makes wear marks easier to see. Do not flood an open gearbox with solvent or allow debris to fall through a bearing or gear opening.
Techniques for extracting a stuck seal
A seal puller is the preferred method when there is enough access. If a puller cannot reach the seal, carefully drive a small extraction screw into the metal shell, keeping the tip shallow and away from the housing. Pull evenly from two points when possible.
For a recessed seal, a hooked tool may work, but control matters more than force. Stop if the tool begins to touch the shaft, bearing, or bore wall. The seal removal demonstration may help illustrate the general sequence, although the exact gearbox will differ.
Inspecting the shaft and housing for wear
With the seal out, inspect the shaft for a polished groove where the lip ran. Look for rust, scoring, burrs, looseness, and signs that the shaft is not running true. Examine the housing bore for corrosion or damage that could prevent the outer edge from sealing.
A minor surface mark may be addressed according to the manufacturer’s repair procedure, but a deeply grooved shaft, loose bearing, or damaged bore needs a proper corrective part or specialist assessment.
Avoiding damage to bearings and sealing surfaces
Keep pry bars away from bearing cages and machined bores. Never hammer directly on a shaft end unless the service procedure specifically allows it and the force is properly supported. A slip can turn a routine seal replacement into a bearing or housing repair.
Before moving on, remove every fragment of the old seal and wipe the area again. The new seal must sit against a clean, undamaged surface.
Install the new gearbox seal correctly
Installation is less about force than control. Compare the new seal with the old one, confirm the direction of the sealing lip, and check that the bore and shaft are clean. A seal that enters crooked can look seated while still leaking almost immediately.
Preparing the new seal and installation area
Inspect the replacement for cuts, distortion, or a displaced spring. Lightly clean the bore and remove only loose corrosion that would interfere with seating. Keep sealant off the lip and use it on the outer edge only when the service information specifically requires it.
Protect the lip from splines, keyways, or sharp threads with a clean sleeve or a thin plastic wrap that can be removed afterward. This is especially useful when the seal must pass over a rough shaft end.
Setting the correct seal orientation and depth
The primary sealing lip normally faces the fluid, while a dust lip faces outward, but the seal design and gearbox instructions take priority. Note the old seal’s depth before removal and follow the specified position. Driving a seal too far can block an oil passage or contact an internal shoulder.
If the housing has a stop, seat the seal against it without forcing it. If there is no stop, use measured depth and even pressure rather than guessing.
Using a driver or installer to seat the seal evenly
Choose a driver that contacts the strong outer shell or installation face and is large enough to avoid the flexible lip. Keep it square to the bore, then tap around the driver in small, alternating steps. A purpose-made installer is best when the seal is recessed or unusually thin.
Pause often to check the gap around the circumference. If one side advances faster, remove pressure and correct the angle before continuing.
Applying lubricant before reassembly
Apply a thin film of the specified gearbox oil to the sealing lip and the shaft contact area. This prevents a dry start that can overheat or damage the lip. Do not pack the seal cavity with an incompatible substance, and do not contaminate the outer seating surface.
Rotate the shaft by hand where possible. It should move without catching the lip or scraping the new seal.
Reassemble the gearbox and refill the fluid
Reassembly should reverse the removal process, but it is not simply a matter of putting everything back quickly. Clean every mating surface, replace one-time-use hardware where required, and keep the new seal protected while nearby parts are installed.
Reinstalling removed components and fasteners
Refit covers, flanges, shafts, guards, and brackets in the order that gives the best support. Start fasteners by hand to avoid cross-threading. Make sure splines, keys, and retaining clips are fully engaged before tightening anything.
If a component needs sealant, apply only the specified bead and keep it away from oil passages. Wipe away excess that could break loose inside the gearbox.
Checking torque specifications and alignment
Use the service manual for torque values, tightening order, and any angle procedure. Restore the marks made during disassembly, but treat them as a guide rather than a replacement for correct alignment. Check that shafts rotate freely and that couplings do not bind.
A torque wrench is particularly valuable on flange, cover, and bearing-retainer fasteners. Uneven tightening can distort a cover or pinch a gasket.
Selecting and adding the correct gearbox oil
Use the viscosity and specification listed for that gearbox, not a fluid chosen solely because it is convenient. Fill on level ground through the correct port, and stop at the manufacturer’s level rather than assuming the entire drained volume must be replaced.
The pressure washer gearbox seal procedure illustrates why fluid grade and level belong in the reassembly plan, but its equipment-specific instructions should not be transferred blindly to another gearbox. Clean the fill plug and install its new washer if required.
Inspecting for immediate leaks or interference
Before lowering the vehicle, inspect the seal perimeter, plug, cover, and every disturbed joint. Rotate the shaft by hand and listen for rubbing. A fresh wet line, displaced spring, or interference with a guard should be corrected before operation.
Wipe the outside dry so any new leak will be easy to identify. Confirm that all tools, rags, and temporary supports are removed from the work area.
Test the repair and prevent future seal failure
A repair is not finished when the new seal is pressed into place. The final checks show whether the seal is centered, the fluid level is correct, and the original cause has been addressed. Begin gently and increase the load only after the first inspection is clean.
Performing a stationary leak check
Start the vehicle or machine according to its normal procedure while keeping clear of moving components. Let it idle or run briefly, then inspect the seal area with a light. Look for a fresh ring of oil rather than relying only on a puddle beneath the gearbox.
If the design permits, select gears or engage the drive only as directed by the service instructions. Stop immediately if oil sprays, a shaft wobbles, or an unfamiliar noise appears.
Road-testing under normal operating conditions
Take a short test drive on a route that allows a safe return. Use normal acceleration, shifting, and braking, but avoid towing or heavy loads during the first check. Pay attention to noise, vibration, shift quality, and any smell of hot oil.
Park on a clean surface and inspect again after the gearbox has cooled. A leak that appears only while the shaft is turning may not show during a static check.
Rechecking the fluid level and seal area
After the test, wait for the gearbox to settle and check the level using the specified method. Top up only with the correct fluid. Then clean and inspect the seal, nearby housing, drain plug, and fill plug once more.
A small amount of assembly oil can spread during the first run, so distinguish residue from a continuing wet trail. If the level drops or oil returns, stop operating the vehicle until the cause is found.
Maintenance habits that extend seal life
Keep vents clear, use the correct fluid level, and repair vibration or shaft misalignment promptly. Avoid directing high-pressure water at seals, and inspect for seepage during routine service rather than waiting for a large puddle.
A practical maintenance routine includes:
- Checking the gearbox exterior at regular service intervals.
- Inspecting shafts and couplings for play or misalignment.
- Replacing contaminated or incorrect fluid promptly.
- Keeping breathers and surrounding areas free of dirt.
These habits address the conditions that often shorten seal life. For a different kind of equipment-maintenance topic, CoolTone is unrelated to gearbox service, so it should not be used as a repair reference.
Conclusion
A successful gearbox seal replacement depends on accurate diagnosis, careful extraction, a correctly oriented seal, and disciplined final checks. Use the gearbox documentation for part numbers, torque values, fluid specifications, and special procedures, and stop for professional help when shaft, bearing, or housing damage is present.
Frequently Asked Questions
How do I know which gearbox seal is leaking?
Clean the housing, inspect the area, and trace the highest fresh oil mark after a short period of operation. The seal closest to the highest new trace is the most likely source, but fluid can travel along shafts and housings.
Can I replace a gearbox seal without removing the gearbox?
Some external seals can be replaced in place if there is enough access and the connected shaft or flange can be removed safely. Others require gearbox removal or partial disassembly, so follow the service procedure for the specific unit.
Should I replace the gearbox oil during seal replacement?
Yes, drain and replace the oil when the seal procedure requires it or when the fluid is contaminated, low, burnt-smelling, or visibly metallic. Always use the specified grade and fill level.
Which way should a gearbox seal face?
The primary sealing lip generally faces the fluid, while a dust lip faces the outside. Seal design varies, so confirm the orientation from the part markings or the gearbox instructions before installation.
What causes a new gearbox seal to leak?
Common causes include a scratched shaft, damaged housing, incorrect seal size, wrong orientation, uneven seating, a blocked vent, overfilling, or shaft misalignment. Replacing the seal alone will not correct every underlying problem.
Can I drive with a leaking gearbox seal?
Only a very short move to a safe repair location may be reasonable when the leak is minor and the fluid level is correct. Continued driving can lower the oil level and damage gears or bearings, so avoid normal use until the leak is fixed.
When should a professional handle the repair?
Seek professional help when the gearbox has major shaft play, loud bearing noise, damaged threads, a cracked housing, severe contamination, or a seal that fails again shortly after replacement. Specialist tools may also be needed for recessed or inaccessible seals.