
Key Takeaways
A free gearbox health check can reveal warning signs before a small fault becomes a major repair. A careful process combines the vehicle’s history, a visual inspection, a controlled drive, and diagnostic information.
- Check for leaks, damaged mountings, worn linkages, and signs of previous repairs.
- Record when noises, vibrations, slipping, or delayed shifts occur.
- Use the correct fluid specification and follow the vehicle maker’s checking procedure.
- Treat a basic inspection as an early screening step, not a complete internal diagnosis.
- Get professional advice promptly if the vehicle is unsafe, worsening, or difficult to control.
What a gearbox health check covers
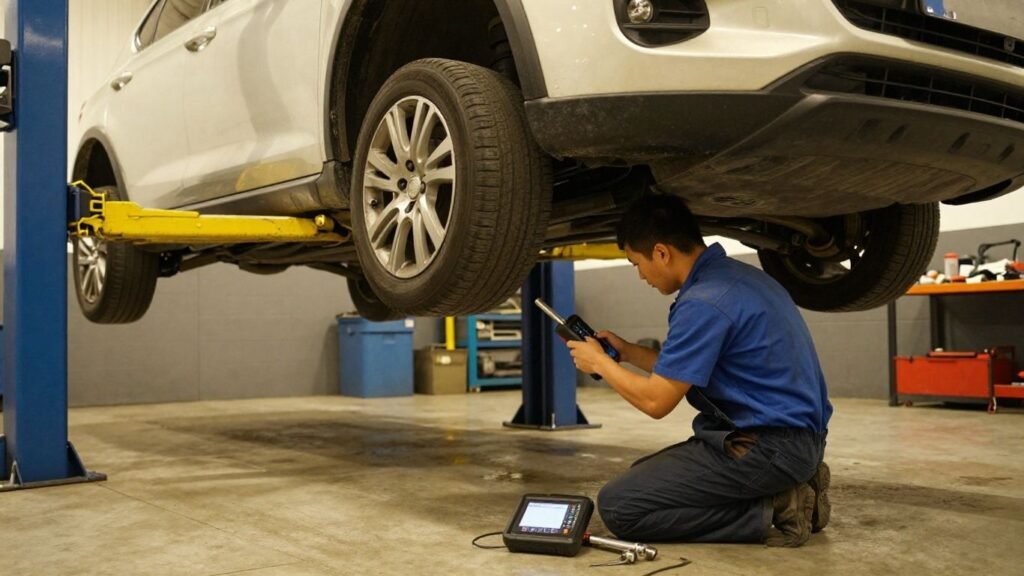
A gearbox health check is a structured review of how the transmission looks, sounds, and behaves. It does not automatically identify every internal defect, but it can bring several useful clues together. The aim is to understand whether the vehicle appears normal, needs monitoring, or should be examined by a specialist soon.
The main components inspected
The inspection usually starts with the gearbox casing, seals, mountings, fluid system, and visible connections. On a manual vehicle, the clutch and shift mechanism also deserve attention; on an automatic, the selector, transmission control systems, and cooling arrangements may be relevant. The exact process varies by vehicle, so the owner’s manual remains the safest reference.
A good check also considers the surrounding drivetrain rather than treating the gearbox as an isolated box. Driveshafts, constant-velocity joints, engine mounts, and cables can create symptoms that feel like transmission trouble.
Manual and automatic gearbox differences
Manual gearboxes often show problems through clutch bite, difficulty selecting a gear, or a noise that changes when the clutch pedal is pressed. An automatic may instead show delayed engagement, harsh or hesitant shifts, slipping, or a warning light. Automated manuals, dual-clutch systems, and continuously variable transmissions have their own operating patterns and service requirements.
Do not assume that a fluid check or road test means the same thing for every design. Some vehicles have no conventional dipstick, and some require a specific temperature or scan procedure before fluid level can be assessed.
Common symptoms of gearbox trouble
Drivers are often the first to notice that a vehicle no longer feels quite right. Symptoms may appear only when pulling away, accelerating uphill, reversing, or changing from cold to warm operation. Small changes deserve attention because they can provide a useful baseline for later diagnosis.
Common clues include a rising engine speed without a matching increase in road speed, a delay before drive or reverse engages, harsh gear changes, new vibration, or a burning smell. A dashboard warning light does not prove a mechanical failure, but it should not be ignored.
When a basic check is not enough
A visual inspection and road test cannot confirm the condition of internal bearings, clutch packs, synchronisers, gears, or hydraulic passages. They also cannot reliably distinguish every gearbox fault from an engine, clutch, mount, or driveshaft problem.
If the vehicle loses drive, bangs violently into gear, leaks heavily, overheats, or becomes difficult to control, stop using it and arrange qualified assistance. For a broader first step, a free gearbox diagnostic tool can help organise symptoms, but an online assessment is not a substitute for an inspection.
How to prepare for a free gearbox health check
Preparation makes a free gearbox health check more useful because it gives the person carrying it out a clearer picture of the vehicle’s history and current behaviour. Bring the vehicle’s paperwork, allow enough time for a proper discussion, and avoid arriving with symptoms reduced by a last-minute top-up or reset. A short written record can be more valuable than trying to remember every detail on the spot.

Gather the vehicle’s service history
Collect invoices, service notes, inspection reports, and records of fluid changes or clutch work. Note the mileage and date of each major repair, along with any period when the vehicle was used for towing, heavy loads, or frequent stop-start driving.
Past work does not prove that a current fault is related, but it helps establish what has already been replaced. It can also prevent unnecessary duplication, much as reviewing repairs to skip helps separate essential work from work that only changes appearances.
Note unusual noises, smells, and vibrations
Write down what you notice, when it happens, and whether the vehicle is cold or warm. Describe whether a sound follows engine speed, road speed, a particular gear, clutch movement, or steering input.
Useful observations include the following:
- The gear or driving condition in which the symptom appears.
- Whether the problem is worse during acceleration, braking, or reversing.
- Whether a smell remains after the vehicle is parked.
- Whether a vibration is felt through the floor, seat, or steering wheel.
This detail gives a technician a starting point and makes a short road test more targeted. It also reduces the temptation to dismiss an intermittent issue simply because it disappears during the appointment.
Check the gearbox fluid requirements
Before inspecting or topping up fluid, find the exact specification and procedure in the owner’s manual. Fluid type, level, temperature, and access method vary widely, and using an unsuitable product can cause further problems.
Never crawl beneath an unsupported vehicle or open a hot component casually. If the procedure calls for a lift, temperature measurement, or a scan tool, leave it to a qualified technician. A useful gearbox health check guide can provide general preparation advice, but the vehicle-specific instructions take priority.
Choose a safe location for the inspection
Park on firm, level ground with good lighting and enough space to walk around the vehicle. Apply the handbrake, keep loose clothing away from moving parts, and allow hot components to cool before looking underneath.
For any driving assessment, choose a quiet route with clear visibility and legal, safe stopping places. Do not attempt a road test if the vehicle has severe slipping, a major leak, smoke, or unreliable braking or steering.
How to perform a visual gearbox inspection
A visual inspection is best treated as a search for evidence, not a hunt for a quick diagnosis. Look for changes, patterns, and fresh contamination while keeping hands away from hot or moving components. Photographs taken before cleaning can help show where a leak or damaged part began.
Looking for fluid leaks and damaged seals
Use a torch to inspect the area around the gearbox casing, shafts, drain and filler points, cooler lines, and seals. Fresh fluid may appear wet and spread outward, while older residue can collect dust and look like thick grime. The colour and smell vary by fluid type, so an unfamiliar stain should be checked rather than guessed at.
A small seep is not automatically harmless. Its location, rate, and effect on fluid level matter, and a leak near a clutch or hot exhaust component deserves prompt attention.
Checking the gearbox casing and mountings
Look for cracks, dents, corrosion, loose fasteners, and signs that the casing has contacted the road. Examine the mounting brackets and rubber components for splitting, collapse, or movement that could allow the drivetrain to shift under load.
A damaged mount can cause clunks and vibration even when the gearbox internals are sound. This is a good example of why the inspection should consider the complete drivetrain rather than assigning every symptom to one component.
Inspecting linkages, cables, and driveshafts
Check visible shift cables, selector linkages, clips, boots, and brackets for looseness or damage. Inspect driveshaft boots for splits and look for grease thrown onto nearby surfaces. Any play, rubbing, or misalignment should be recorded for closer examination.
Do not force a linkage or rotate a wheel while another person is underneath the vehicle. Safe access matters more than completing a questionable check. Practical guidance on external gearbox inspection can help with preparation, but it cannot replace safe workshop equipment.
Identifying signs of previous repairs
Fresh sealant, mismatched fasteners, tool marks, disturbed wiring, or a noticeably cleaner section of casing can suggest earlier work. These signs are not proof of poor workmanship; they simply indicate that the repair history should be verified.
Compare what you see with the invoices and ask what was replaced, why it was replaced, and whether the original symptom returned. A repaired gearbox may be perfectly serviceable, while an undocumented repair may call for more careful testing.
How to check gearbox operation during a drive
A road test should be controlled, legal, and matched to the vehicle’s normal operating conditions. The driver should concentrate on smooth inputs while a passenger records observations where possible. Stop if the vehicle becomes unsafe or the symptoms worsen sharply.

Testing clutch engagement and gear selection
In a manual vehicle, notice where the clutch begins to engage and whether the pedal feels consistent. Select each gear without forcing the lever, paying attention to baulking, crunching, or a gear that repeatedly refuses to engage.
In an automatic, check how promptly and smoothly the vehicle selects drive and reverse while the brake is firmly applied. A delay, thump, or unexpected movement should be recorded rather than repeatedly recreated.
Watching for slipping, hesitation, and delayed shifts
Slipping can feel like the engine revs rise while the vehicle gains speed slowly. Hesitation may occur when pulling away or requesting acceleration, while delayed engagement is often noticed after selecting drive or reverse.
Try to identify the exact conditions without aggressive driving. A controlled comparison between light and moderate acceleration can reveal whether the symptom is repeatable, but it should never be pushed to the point of risking damage or loss of control.
Listening for whining, grinding, and clunking
Listen with the radio off and notice whether a noise follows engine speed, vehicle speed, a particular gear, or clutch operation. Whining, humming, grinding, and clunking can have several causes, including bearings, gears, mounts, tyres, or driveshafts.
A sound that changes during a gentle left or right turn may not come from the gearbox at all. This is why a road-test note should describe the conditions instead of naming a failed part prematurely. For a used vehicle, a structured transmission test drive can help organise these observations.
Comparing performance when the gearbox is cold and warm
Some faults are most apparent after the vehicle has sat overnight, while others develop as fluid and components reach operating temperature. Record the first few shifts, the time or distance before the symptom appears, and whether the behaviour improves or deteriorates.
Do not deliberately overheat a suspect transmission to reproduce a fault. If the vehicle becomes increasingly harsh, slips, smells burnt, or displays a warning, end the test and seek advice.
Using diagnostic tools for a deeper check
Diagnostic equipment can add useful information when a visual inspection and drive report leave questions unanswered. It may reveal stored or current electronic faults and provide readings that are difficult to obtain by eye. Results still need to be interpreted alongside the vehicle’s symptoms and service history.
Reading transmission fault codes
A compatible scan tool can communicate with relevant vehicle modules and report stored, pending, or active fault codes where supported. Write down the complete code, the module that produced it, and any associated data before clearing anything.
A code is a clue, not a verdict. Clearing codes without recording them can remove useful evidence and may make an intermittent problem harder to trace.
Understanding what diagnostic results can and cannot confirm
Electronic results can point toward a sensor, solenoid, communication, or control issue, but they do not automatically prove that a particular component has failed. A mechanical problem may produce no code, and one code may be triggered by a wiring, voltage, fluid, or mechanical issue elsewhere.
The most dependable assessment combines scan results with a physical inspection and repeatable symptoms. That is also the purpose of a free transmission diagnostic service: to bring visual checks, fluid observations, road behaviour, and computerized information into one evaluation rather than relying on a single reading.
Checking fluid condition and temperature
Fluid level and condition should be assessed using the manufacturer’s specified method. Look for an unusual smell, contamination, or a level outside the permitted range, but do not interpret colour alone as proof of failure.
Temperature matters because some systems require a particular operating range for a meaningful level or pressure check. If a scan tool or temperature probe is needed, use the correct equipment and avoid opening a hot system unnecessarily.
Knowing when specialist equipment is required
Specialist equipment may be needed for vehicles without a dipstick, electronically controlled transmissions, sealed systems, pressure testing, adaptation procedures, or internal fault investigation. A lift, fluid exchange equipment, inspection camera, or manufacturer-level diagnostic access may also be appropriate.
Arrange specialist help when the fault is persistent, the vehicle is losing drive, the casing is damaged, or the initial evidence conflicts. A free check should make the next decision clearer, not encourage unsafe experimentation.
What to do after the free gearbox health check
Once the inspection is complete, ask for the findings in plain language and separate confirmed observations from possibilities. Keep any codes, photographs, fluid notes, and road-test results with the service history. The next step should reflect safety and evidence, not just the most expensive possibility.
Deciding whether the vehicle is safe to drive
A vehicle may be reasonable to drive to a workshop if the symptoms are mild, stable, and do not affect control, but that decision belongs with a qualified person who has assessed the vehicle. Heavy leaks, smoke, loss of drive, severe impact into gear, or rapidly worsening symptoms call for recovery rather than continued driving.
Ask whether the recommendation is to stop immediately, drive only a short distance, or monitor the vehicle while arranging an appointment. Clear limits are more useful than vague reassurance.
Separating minor adjustments from major repairs
Some findings may involve an adjustment, damaged boot, mount, cable, seal, or fluid-related service. Others may require removal of the gearbox, internal inspection, reconditioning, or replacement. The inspection alone may not distinguish these categories with certainty.
Request an explanation of the evidence, the proposed test, and the consequence of postponing it. Do not approve a major repair solely because a warning symptom has an alarming name.
Comparing repair, replacement, and reconditioning costs
Ask for itemised estimates that include parts, labour, fluid, diagnostics, taxes, and any related work. Compare the warranty, expected timescale, source and condition of a replacement unit, and whether the underlying cause will also be addressed.
The cheapest quote may not be the lowest long-term cost, while the most extensive option may not suit an older vehicle. For planning generally, even unrelated decisions such as Travel FX show why fees, timing, and total cost should be compared rather than looking at one headline figure.
Creating a maintenance plan to prevent further damage
After repairs or a clean bill of health, record the date, mileage, fluid specification, and recommended review interval. Follow the service schedule, investigate new symptoms early, and avoid towing or driving practices that exceed the vehicle’s limits.
A simple maintenance plan can include:
- Reviewing fluid and service requirements at the recommended interval.
- Recording new noises, shift changes, leaks, or warning lights immediately.
- Checking that previous repairs have resolved the original symptom.
- Scheduling a follow-up inspection when a technician has advised one.
These habits make later diagnosis easier and may prevent a minor issue from developing into extensive damage. The same preference for planned upkeep appears in commercial sign repair, where regular inspection helps identify problems before disruption grows.
A useful record should be factual and dated. Even a note about an intermittent shift can help connect a symptom to temperature, mileage, or a previous service.
For broader vehicle-care decisions, keep the same discipline when reviewing outside information. A guide to reading injury reports is about a different subject, but the underlying habit—checking timely evidence instead of guessing—also applies here. For digital maintenance of a service business, Brawn Media covers SEO fundamentals; it is not a gearbox diagnostic source, so it should not be used to answer mechanical questions.
Conclusion
A free gearbox health check is most valuable when it turns vague concerns into recorded observations and a sensible next step. Check the history, inspect visible components, drive carefully, use diagnostic results in context, and stop driving when safety is uncertain. Early attention cannot prevent every failure, but it can reduce guesswork and help avoid unnecessary damage.
Frequently Asked Questions
What is included in a free gearbox health check?
It may include a discussion of symptoms, a visual inspection, a fluid and leak check, a road test, and an electronic scan where suitable equipment is available. The exact scope varies by vehicle and provider.
Can a free gearbox health check find every fault?
No. Basic checks may identify warning signs, but internal wear, intermittent faults, and some hydraulic or electronic problems require specialist testing or partial disassembly.
How long does a gearbox health check take?
The time depends on the vehicle, symptoms, access to components, and whether a road test or diagnostic scan is included. Allow time to explain the history as well as time for the inspection itself.
Should I check gearbox fluid myself?
Only if the vehicle’s instructions provide a safe, clear procedure and you have the required equipment. Some transmissions must be checked at a specified temperature or by a trained technician.
Is a gearbox warning light always serious?
It should always be investigated, although it does not by itself prove that the gearbox needs replacement. The stored code, driving symptoms, and physical findings determine the urgency.
Can I drive with a slipping gearbox?
Continued driving may increase heat and wear, and slipping can affect acceleration and control. Stop if the symptom is severe or worsening and ask a qualified technician whether recovery is needed.
What information should I bring to the inspection?
Bring service records, repair invoices, mileage, warning-light details, and notes describing when noises, smells, vibrations, or shift problems occur. Mention any towing, heavy loading, or recent work as well.