

Key Takeaways
A gearbox failure needs a calm, safe response before anyone reaches for tools. These steps help protect people, limit secondary damage, and give a repair provider the information needed to move quickly.
- Isolate the equipment and follow site lockout procedures before inspection.
- Record noises, heat, vibration, leakage, load, and the timing of the failure.
- Choose a provider that can inspect, repair, test, and document the work.
- Compare an on-site repair, workshop rebuild, and replacement on total downtime and risk.
- Treat the failure analysis as a guide for better lubrication, alignment, monitoring, and spares planning.
Assess the gearbox failure and immediate risks
A sudden stop, unusual noise, or leaking lubricant does not always identify the failed component by itself. The gearbox may be the source, but the motor, coupling, brake, driven load, or control system can create similar symptoms. Start with safety and evidence rather than assumptions, especially when the phrase emergency gearbox repair today reflects a production-critical shutdown.
Visible leaks, rising temperature, vibration, tooth-chatter, and a burnt-oil smell deserve prompt attention. Guidance on common gearbox warning signs also points to leaks, vibration, loud noise, and poor lubrication as reasons to investigate without delay.
Warning signs that require urgent attention
A new grinding or knocking sound is more concerning than a steady operating hum, particularly if it changes with speed or load. Metal particles in oil, a damaged seal, a rapidly warming housing, or a shaft that does not turn freely can indicate internal damage. A repeated trip or sudden loss of output may also be a symptom of a connected drive problem rather than a simple gearbox fault.
If the equipment has stopped under load, do not restart it merely to reproduce the sound. A short record of what operators heard and felt before the stop is usually more useful than another test run.
How to shut down equipment safely
Use the site’s emergency-stop and isolation procedure, then apply lockout/tagout controls appropriate to the equipment. Stored energy may remain in elevated loads, rotating members, hydraulic systems, capacitors, or a loaded conveyor, so isolation must cover the complete machine rather than just the motor starter.
Keep people clear until the responsible maintenance or safety lead confirms that inspection can begin. The same principle applies to electrical incidents: isolate power and call a qualified professional, as explained in this electrical emergency guide, rather than attempting an improvised repair.
Separating gearbox problems from motor or drive issues
Once the unit is safe, compare the symptom with the operating history. A motor that draws unusual current, a coupling that has shifted, a brake that drags, or a control fault can all overload a gearbox. Check the surrounding assembly visually, but avoid uncoupling or disassembling components before the repair team agrees on a safe diagnostic plan.
Note whether the noise follows motor speed, output speed, or machine load. That distinction helps technicians decide whether to begin with the gearbox, the prime mover, the coupling, or the driven equipment.
When continued operation can cause greater damage
Running with low oil, severe vibration, damaged teeth, or a loose bearing can turn a repairable problem into shaft, housing, and gear damage. It can also spread metal through the lubricant and contaminate components that initially remained serviceable. When a failure threatens people, product, or connected machinery, stopping early is usually the less expensive decision.
Document the condition before cleaning anything. A few photographs, an oil sample, and a clear shutdown time can preserve evidence that would otherwise disappear during hurried troubleshooting.
Find the right emergency gearbox repair provider
The right provider should make the first call easier, not create another uncertainty during a shutdown. Ask how the team handles intake, isolation advice, inspection, parts sourcing, machining, testing, transport, and reporting. A low initial estimate is less useful if the scope changes after the unit is opened.
Look for a repair path that fits the gearbox’s size, design, and operating duty. Coverage should mean more than a phone answered after hours; it should connect the call to people who can make a practical decision about inspection and recovery.
What 24/7 repair coverage should include
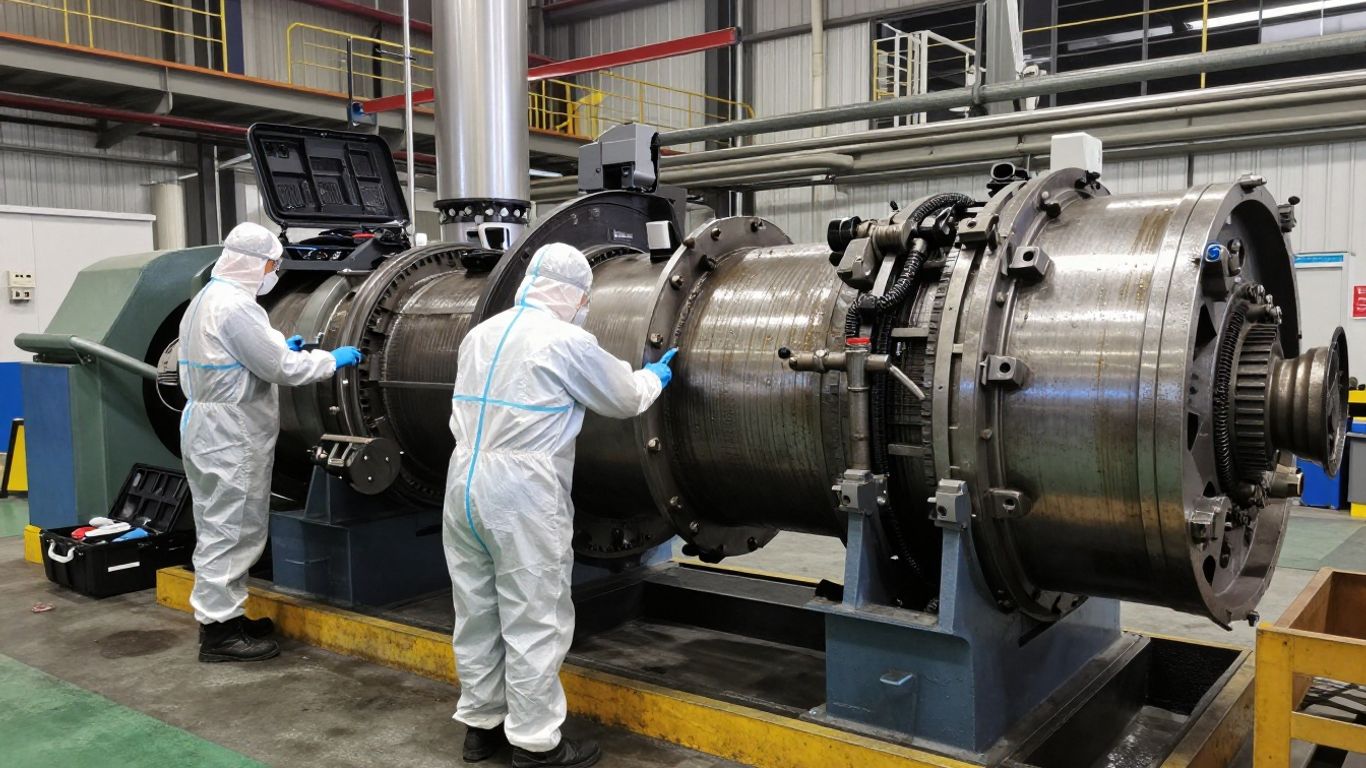
A genuine emergency service should provide a clear contact route, an initial information request, and a realistic next step. It may involve a mobile technician, controlled removal, workshop teardown, or expedited parts work depending on the failure. The published descriptions of emergency gearbox repair services and rapid gearbox breakdown analysis illustrate why response, inspection, and rebuild planning need to work together.
Ask whether the provider can support the hours your site actually operates and whether transport, lifting, and access constraints are included in the response plan. Do not assume that a 24/7 phone line means a technician or workshop is immediately available.
Questions to ask before authorizing service
Before approving work, ask for the inspection scope, likely decision points, and the way additional costs will be communicated. It is reasonable to request photographs and a written evaluation before major repair work begins. Also confirm who is responsible for preserving failed parts and recording measurements.
A short call should clarify at least these practical points:
- What information and photographs are needed before dispatch?
- Can the provider inspect on site, or must the unit go to a workshop?
- Which parts, machining, testing, and transport are included in the estimate?
- What conditions would make replacement safer or faster than rebuilding?
These answers reveal whether the provider has a process or is simply promising speed. For larger units, urgent large-scale gearbox repairs may require different lifting, transport, and workshop arrangements than a small drive.
Evaluating mobile, on-site, and workshop repairs
On-site work can reduce removal time when the damage is accessible and the location has suitable lifting and cleanliness controls. A workshop may be better when the gearbox needs full disassembly, precision machining, non-destructive testing, or controlled assembly. Mobile inspection and workshop rebuilding can also be combined.
Ask how the repaired unit will be protected during transport and how alignment will be checked after installation. The goal is not simply to move the gearbox quickly; it is to return a verified assembly to service without transferring the original fault to another component.
Confirming experience with your gearbox type
Share the manufacturer, model, ratio, mounting arrangement, input and output details, lubricant, and application. Experience should be demonstrated through relevant inspection and repair methods rather than broad claims. If the design is old or documentation is missing, ask how dimensions and gear geometry will be established.
A provider’s ability to coordinate teardown, reverse engineering, machining, and testing matters more than a generic promise of fast service. Keep the discussion focused on the actual gearbox and its duty cycle.
Provide the information needed for a fast diagnosis
The first diagnosis is only as good as the information supplied with the request. A repair team needs enough context to distinguish a sudden internal break from progressive wear, overload, contamination, or installation error. Send what is available, label it clearly, and say when a detail is unknown.
Do not delay the call while trying to assemble a perfect maintenance history. A partial but accurate record is more valuable than a complete-looking record built from guesses.
Gearbox make, model, and service history
Start with the nameplate, serial number, ratio, mounting position, and rated speed if they are available. Add installation date, previous repairs, bearing or seal changes, lubricant type, and recent modifications. The service history can show whether the present failure follows an earlier pattern.
If the plate is unreadable, photograph it anyway and provide dimensions, application details, and any old purchase or maintenance records. The repair team can then decide what must be verified during inspection.
Symptoms, operating conditions, and failure timing
Describe what changed, when it changed, and under what load. Mention startup behavior, normal and abnormal temperatures, vibration, leakage, noise, trips, production changes, and any recent jam or overload. Operators often remember a brief sound or movement that never appears in a maintenance report.
A precise timeline can separate a gradual lubrication issue from a failure caused by a single event. Include whether the unit stopped cleanly, seized, coasted down, or continued turning with reduced output.
Photos, videos, and inspection data
Photograph the complete installation before removing guards, then capture the nameplate, housing, seals, coupling, lubricant condition, and any visible debris. A short video of an abnormal sound can help, but never run unsafe equipment for the purpose of recording one. Include dates and a simple description with every file.
When sharing files, keep the original images and note who took them. Visual records are useful during a remote triage call and can help a technician prepare tools, lifting equipment, and likely consumables.
Spare parts, drawings, and maintenance records
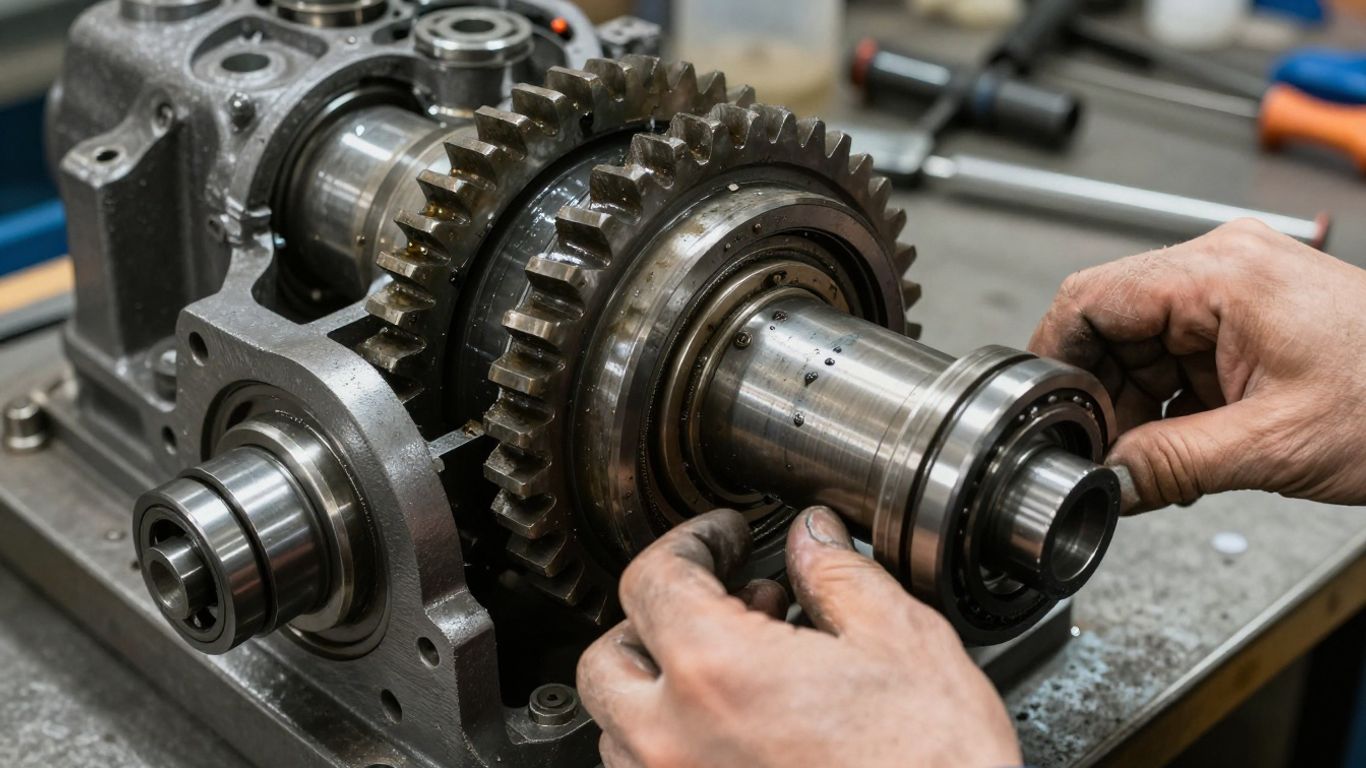
Send assembly drawings, parts lists, lubrication instructions, alignment readings, vibration reports, and previous inspection photographs. Identify parts already held on site, including bearings, seals, couplings, and spare gearboxes. A missing drawing does not make repair impossible, but it can change the inspection and measurement work required.
Keep records from the failure in one place. Even unrelated digital tools can create confusion when information is scattered; a review of secure digital connection tools is not a gearbox guide, but the broader lesson is useful here: make access controlled, consistent, and practical for the people coordinating the response.
Choose between on-site repair and replacement
The decision should follow inspection findings, not pressure alone. An on-site repair may restore function quickly when the failure is limited and access is good, while a workshop rebuild may be safer when internal damage is extensive. Replacement may be appropriate when the housing is beyond repair, the design is unsuitable for the duty, or a verified spare can be installed sooner.
Compare the full recovery path, including removal, transport, parts, machining, installation, alignment, testing, and lost production. A new unit is not automatically the fastest option, and a repair is not automatically the cheapest.
Situations suited to an on-site repair
On-site work can suit accessible seals, couplings, bearings, or external mounting problems where the housing and gearset remain sound. It may also make sense when lifting the unit out would create a long outage or introduce substantial rigging risk. The technician should still define what cannot be verified without a full teardown.
Protect the work area from dust, moisture, and accidental contamination. After the immediate fix, schedule a fuller inspection if the original cause has not been established.
When workshop rebuilding is the better option
A workshop is generally better for extensive tooth damage, shaft distortion, housing wear, contaminated lubricant, or multiple failed bearings. It provides controlled cleaning, measurement, machining, and assembly conditions. It also gives the repair team more room to compare damaged parts and identify the initiating failure.
Ask for a documented inspection before approving the rebuild. Reports with photographs, measurements, and a defined scope make it easier to decide whether the recovered unit meets the application’s needs.
Comparing temporary fixes with permanent solutions
A temporary measure may be reasonable when it is controlled, clearly limited, and followed by a scheduled permanent repair. It should never conceal a safety issue or allow a known destructive condition to continue indefinitely. Label temporary changes and communicate operating limits to every shift.
A permanent solution addresses the cause as well as the damaged part. That may mean correcting alignment, changing the lubricant, improving sealing, reducing overload, or redesigning a mounting detail rather than simply installing another bearing.
Balancing downtime, cost, and reliability
Use a simple comparison that includes expected lead time, confidence in the diagnosis, parts availability, installation requirements, and the consequence of another failure. An expedited workshop route may be worthwhile when production losses are high, while a staged repair may suit equipment with a safe standby path.
The best decision is the one that restores service without creating an unexamined reliability risk. Accelerated gearbox repair and machining is one example of why in-house inspection, rebuilding, and transport coordination can affect the practical recovery timeline, but every job still depends on its actual findings.
Understand the emergency repair process
Emergency repair is not just a faster version of routine maintenance. The team must preserve evidence, control the scope, source suitable parts, and test the result under time pressure. Good communication prevents speed from turning into avoidable rework.
The exact sequence varies by gearbox, but the work should move from safe inspection to measured repair and documented recommissioning. Each stage should produce information that supports the next decision.
Initial inspection and failure analysis
The first inspection records external condition, oil level, leakage, mounting, coupling, shaft movement, and visible damage. Technicians then compare those observations with the reported symptoms and operating conditions. If the unit has failed catastrophically, the inspection should consider whether fragments may have damaged the housing or connected equipment.
A useful failure analysis asks what happened first, not only which part is broken. That distinction helps prevent a replacement component from failing for the same underlying reason.
Disassembly, cleaning, and component measurement
Disassembly should be controlled and documented so that parts remain identifiable and evidence is not lost. Cleaning exposes cracks, scoring, pitting, fretting, and contact patterns that may be hidden under oil and debris. Components are measured against the applicable drawings, specifications, or verified original dimensions.
Keep reusable parts separate from scrap and record the reason for each replacement. This creates a repair trail that maintenance staff can use when planning the next inspection.
Bearing, seal, shaft, and gear replacement
Replacement decisions should follow measurements and failure evidence. Bearings and seals may be straightforward to source, while gears, shafts, and housings can require machining or specially verified dimensions. The repair team should confirm material, fit, clearances, tooth condition, and compatibility with the lubricant and operating duty.
Do not substitute a part solely because its outside dimensions appear similar. Internal geometry, rating, fit, and load direction all matter to gearbox life.
Testing, alignment, lubrication, and recommissioning
Before return to service, the repaired unit should be assembled correctly, filled with the specified clean lubricant, and checked for shaft movement, leakage, and alignment. Testing may include rotation, backlash or contact checks, temperature observation, vibration readings, and a controlled load increase. The final report should state what was repaired, what was measured, and any follow-up checks required.
Recommissioning is a managed handover rather than a single start command. Operators should know what to watch during the first run and when to stop if temperature, noise, vibration, or leakage rises unexpectedly.
Prevent another urgent gearbox failure
A repaired gearbox should return with a prevention plan, not just a delivery note. Review the initiating failure with operators, maintenance staff, and the people responsible for installation and loading. Small changes in lubrication, alignment, inspection frequency, or spare availability can reduce the chance of another emergency.
Use the repair report as a baseline. Record the normal temperature, vibration, sound, and lubricant condition after recommissioning, then compare future readings with that reference.
Establishing a condition monitoring routine
Choose monitoring methods that the site can perform consistently. Depending on the equipment, that may include visual checks, temperature readings, vibration measurements, oil sampling, noise observation, and periodic inspection of seals and breathers. Trends are more useful than isolated numbers because they reveal a gradual change before a shutdown.
Set clear escalation points and assign responsibility for reviewing results. A reading that nobody sees cannot guide maintenance.
Improving lubrication and contamination control
Use the specified lubricant, quantity, and change interval, and keep containers and transfer tools clean. Check breathers, seals, drain points, and storage conditions so water, dust, and incorrect oil do not enter the housing. Excess lubricant can also create heat and churning, so more is not always safer.
Record top-ups and oil changes rather than relying on memory. Changes in oil color, odor, viscosity, or metal content should trigger a reasoned inspection rather than an automatic reset of the maintenance schedule.
Checking alignment, loading, and operating conditions
Verify shafts, couplings, mounting feet, soft foot, and structural supports after installation or any major equipment change. Compare actual load and speed with the gearbox rating, and investigate jams, repeated starts, shock loads, and production changes. A gearbox that is correctly assembled can still fail when its operating conditions change.
Make the checks part of commissioning and planned shutdowns. Alignment is not a one-time concern if foundations settle, couplings wear, or connected machinery moves.
Planning critical spares and preventive maintenance
Identify the parts that would stop recovery if they were unavailable. Store them correctly, confirm part numbers, and keep drawings or measurements accessible. A spare gearbox may shorten downtime, but seals, bearings, couplings, fasteners, and lifting arrangements can be just as important.
Review the plan after every failure and after every major repair. Even a completely different topic, such as reliable energy access planning, reinforces a practical principle relevant to maintenance: continuity depends on preparation, not only on reacting quickly.
Conclusion
A fast gearbox recovery begins with a safe shutdown, accurate evidence, and a provider that can explain the repair path. Once the unit is restored, monitoring, clean lubrication, sound alignment, and realistic spare planning turn an emergency response into a more dependable maintenance program.
Frequently Asked Questions
What should I do first when a gearbox fails?
Stop the equipment using the approved procedure, isolate all energy sources, control stored energy, and keep people clear. Then record the symptoms and contact a qualified repair provider.
Can I restart a gearbox to confirm the noise?
Do not restart it simply to reproduce a symptom. If the fault involves damaged gears, bearings, lubrication, or a loose component, another run can increase the damage or create a safety hazard.
How quickly can an emergency gearbox repair be completed?
The timing depends on the gearbox size, failure mode, parts availability, access, transport, and testing requirements. A clear description and good photographs can shorten the diagnostic stage.
Is an on-site repair always faster than a workshop rebuild?
No. An on-site repair avoids removal and transport, but a workshop may complete extensive inspection, machining, and assembly more efficiently under controlled conditions.
What information should I send to a repair provider?
Send the nameplate and model details, application and load, failure timeline, operating symptoms, photographs, videos if safely available, lubricant information, service history, drawings, and spare-parts information.
When should a gearbox be replaced instead of repaired?
Replacement may be preferable when the housing or major components are beyond economical repair, a suitable verified spare is immediately available, or the existing unit no longer suits the application. The decision should follow inspection findings.
How can I reduce the chance of another gearbox failure?
Establish routine condition monitoring, maintain clean and correct lubrication, control contamination, verify alignment and loading, document operating changes, and stock critical spares with a preventive maintenance plan.